
Silver Efex Pro Black and White Editing
Date 2026/03/05 11:13:08 by Darren Donovan
Silver Efex Pro Black and White Editing: A Practical Guide to Darren’s Field Workflow
Date 2026/03/04 09:00:00 by Darren Donovan
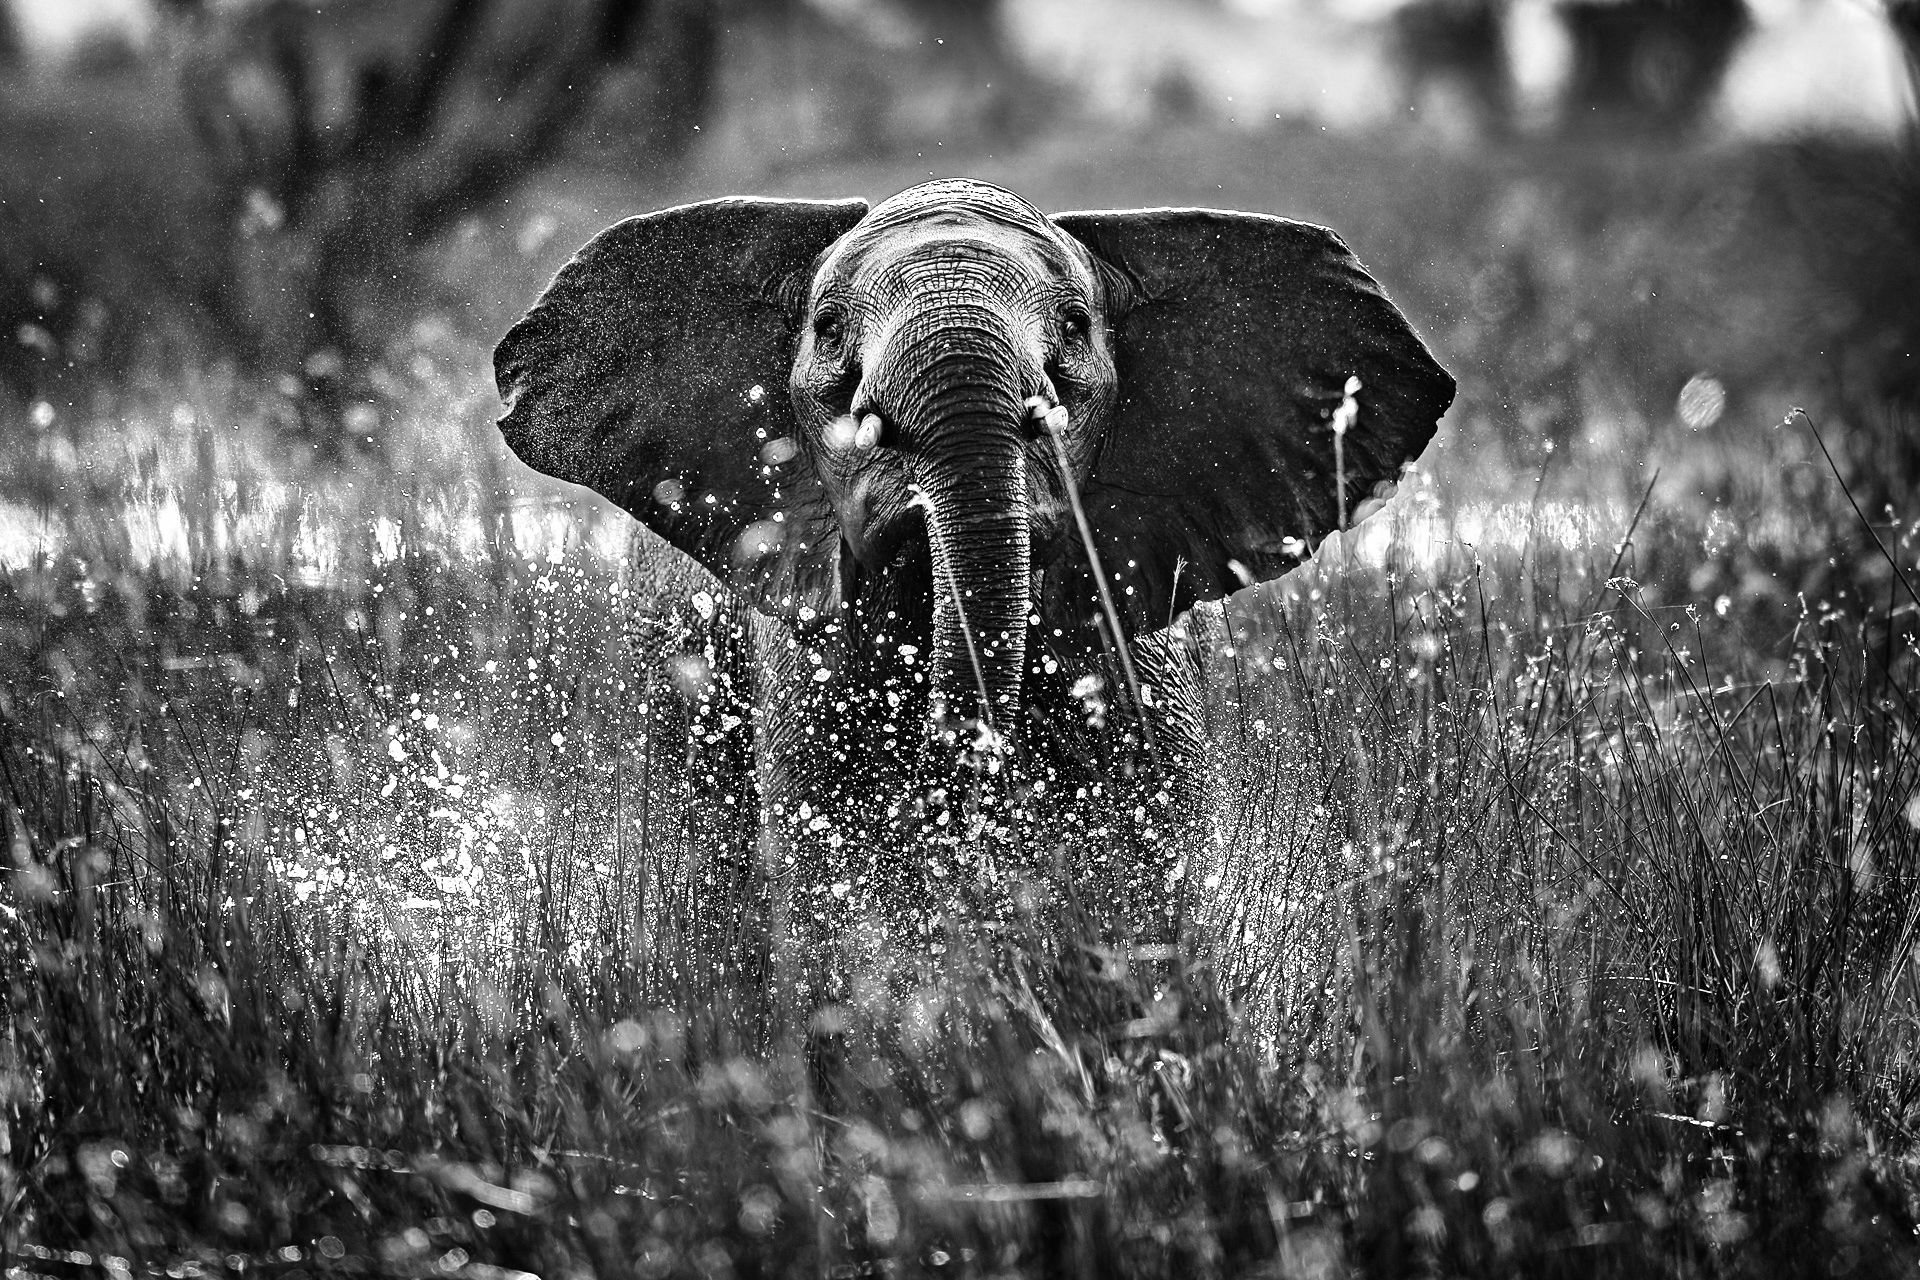
Black and white wildlife photography works when tone, light, and texture carry the story on their own. The goal is not to “make it black and white”. The goal is to build a rich spread of greys between true black and true white, so the image has depth and punch without losing detail.
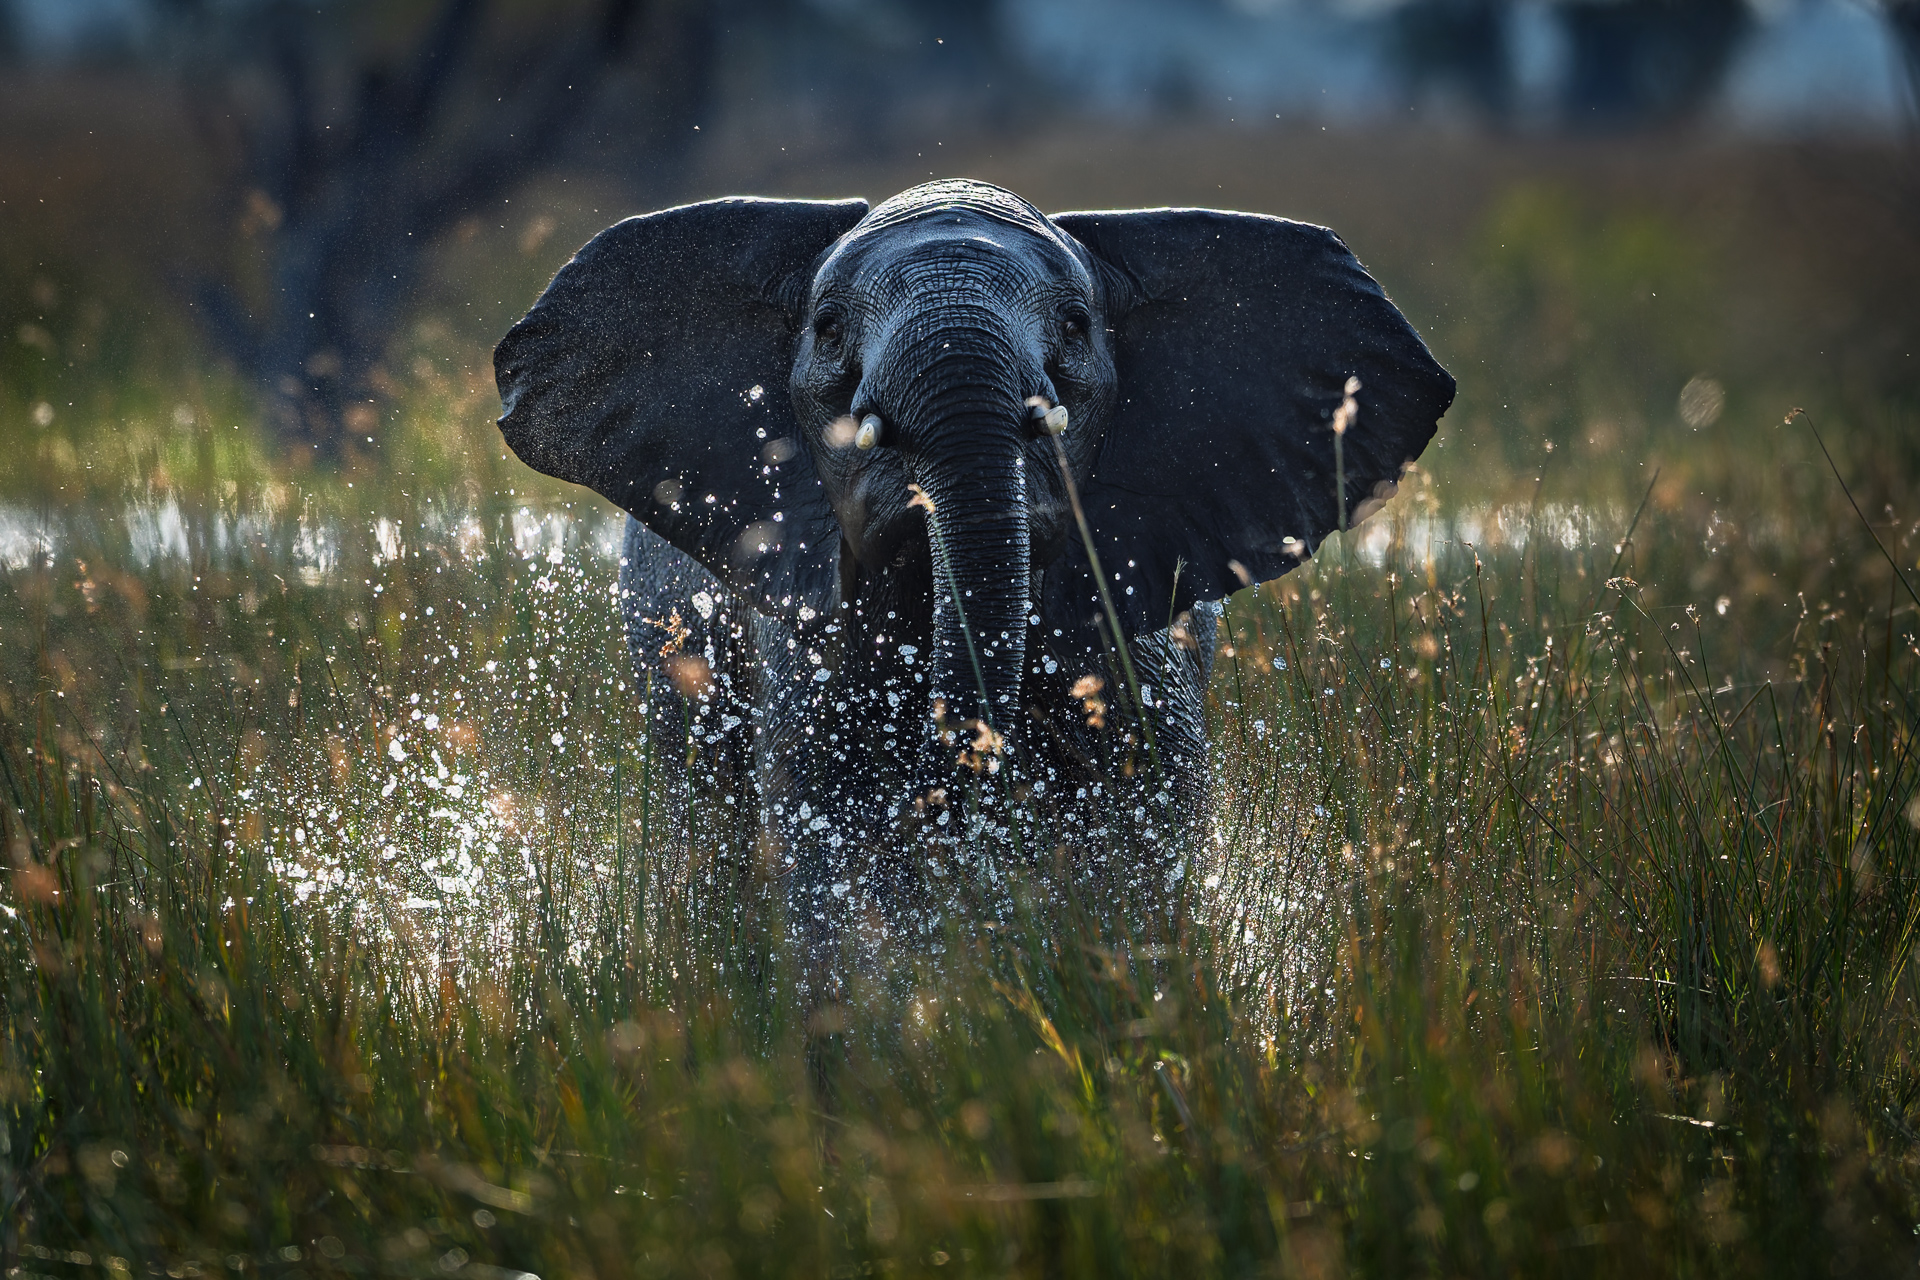
This guide walks through the core Silver Efex Pro steps Darren uses to convert a safari image to black and white, using a backlit elephant in the Okavango Delta as the example. Use it as a reference after watching the YouTube video.
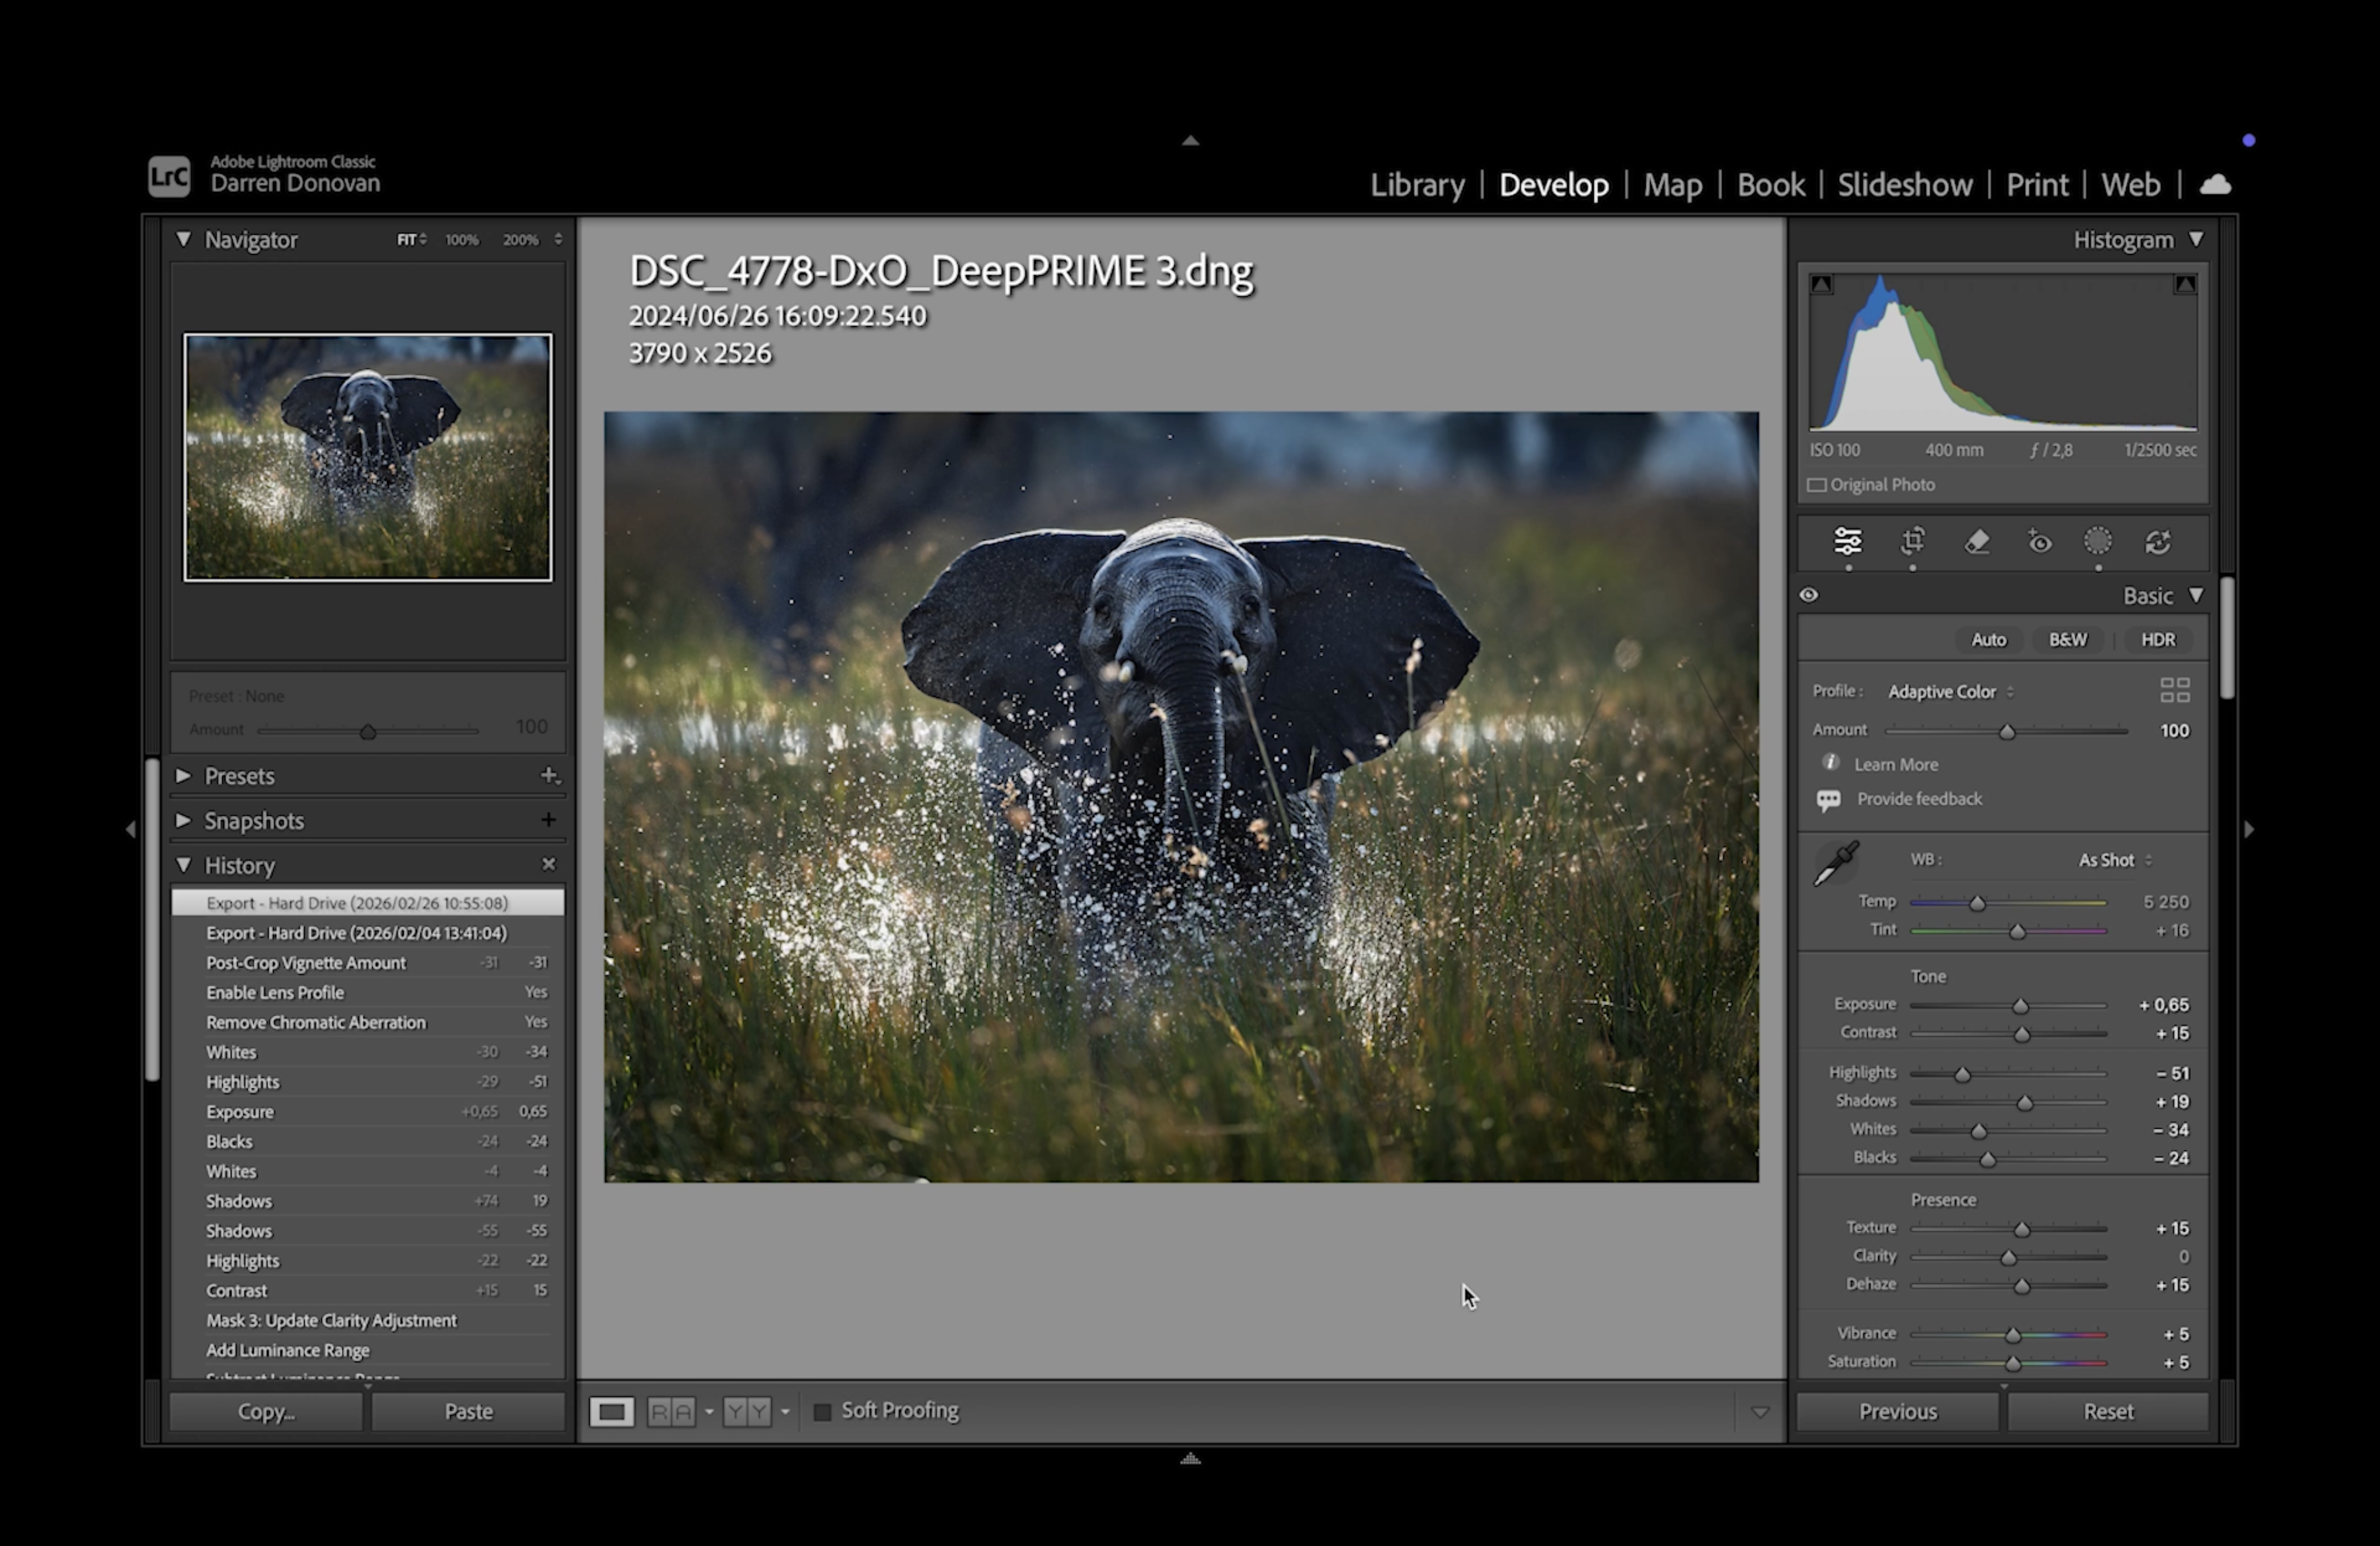
1. Start With the Foundation in Lightroom First
Before opening Silver Efex Pro, Darren finishes all the essential file prep in Lightroom. This creates a clean base so your monochrome conversion behaves predictably.
Recommended prep:
- Denoise (if needed)
- Sharpening
- Any exposure and tonal corrections you want locked in
- General file cleanup
Why this matters: Silver Efex is strongest when it is used for tone shaping and monochrome interpretation, not for fixing basic file issues.
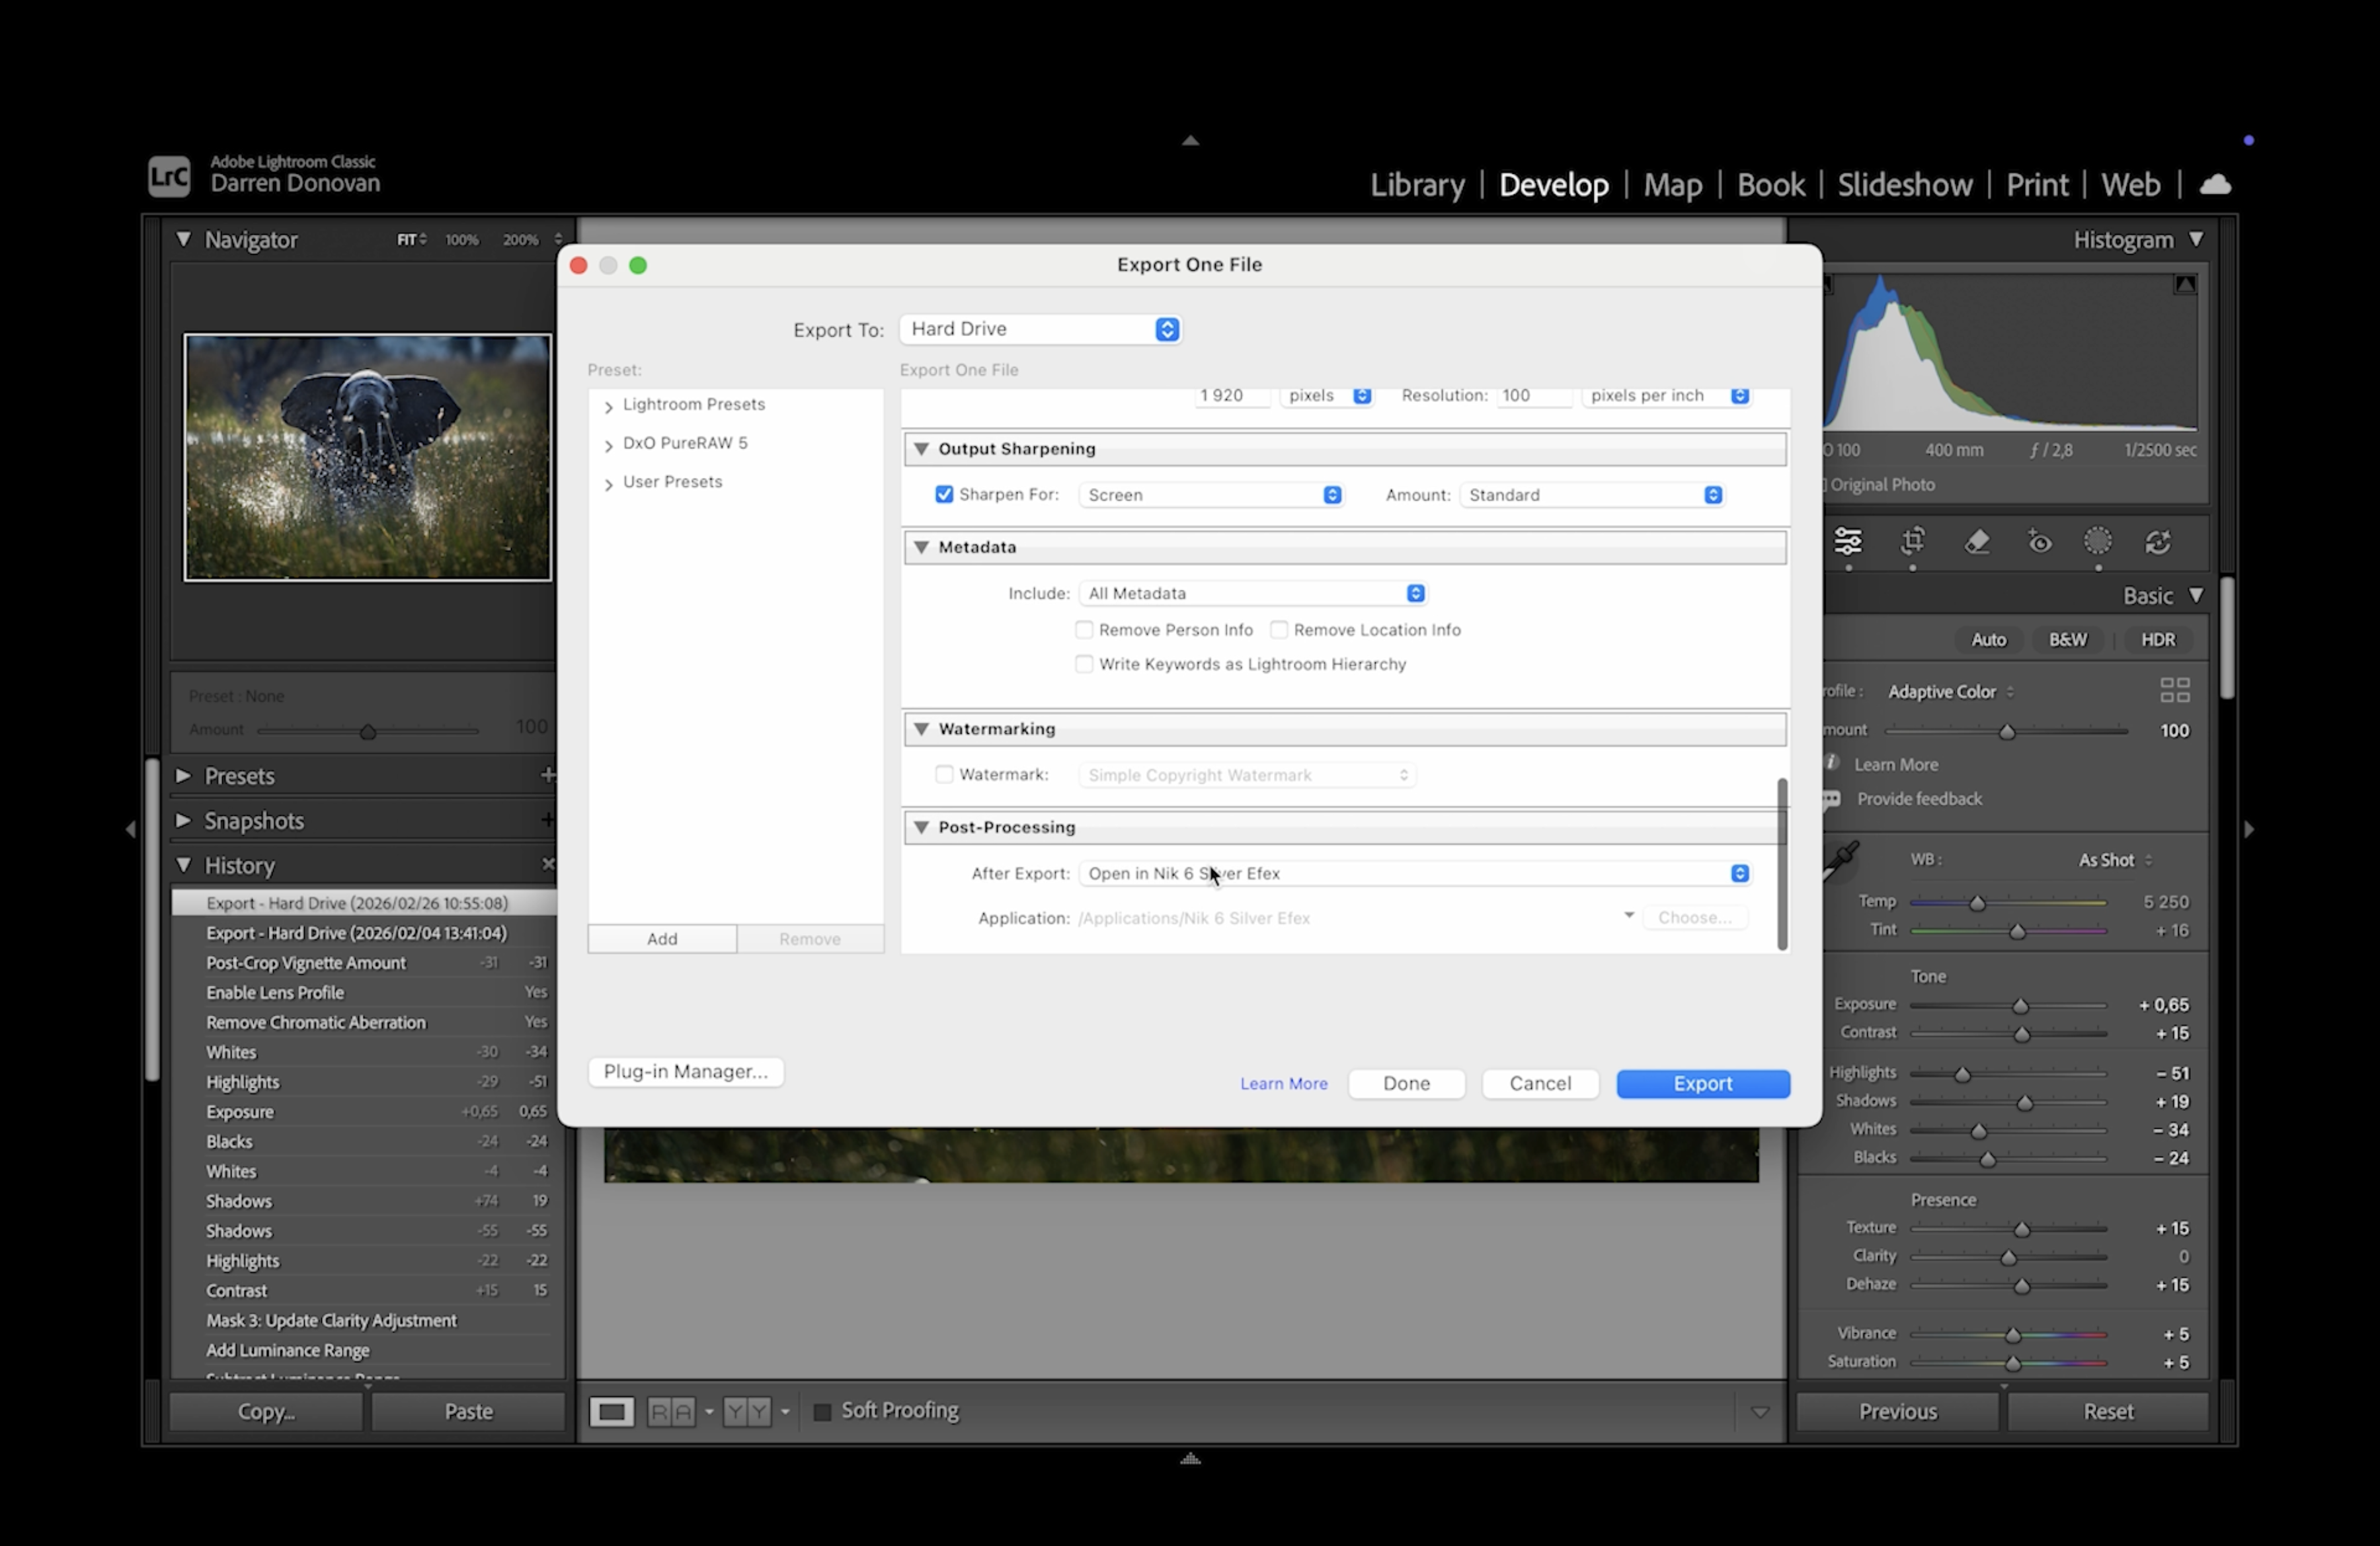
2. Export to Silver Efex Pro From Lightroom
Once the Lightroom work is done, export the selected image directly into Silver Efex Pro using your Lightroom plugin workflow.
Workflow:
- Lightroom → Export / Open In → Silver Efex Pro
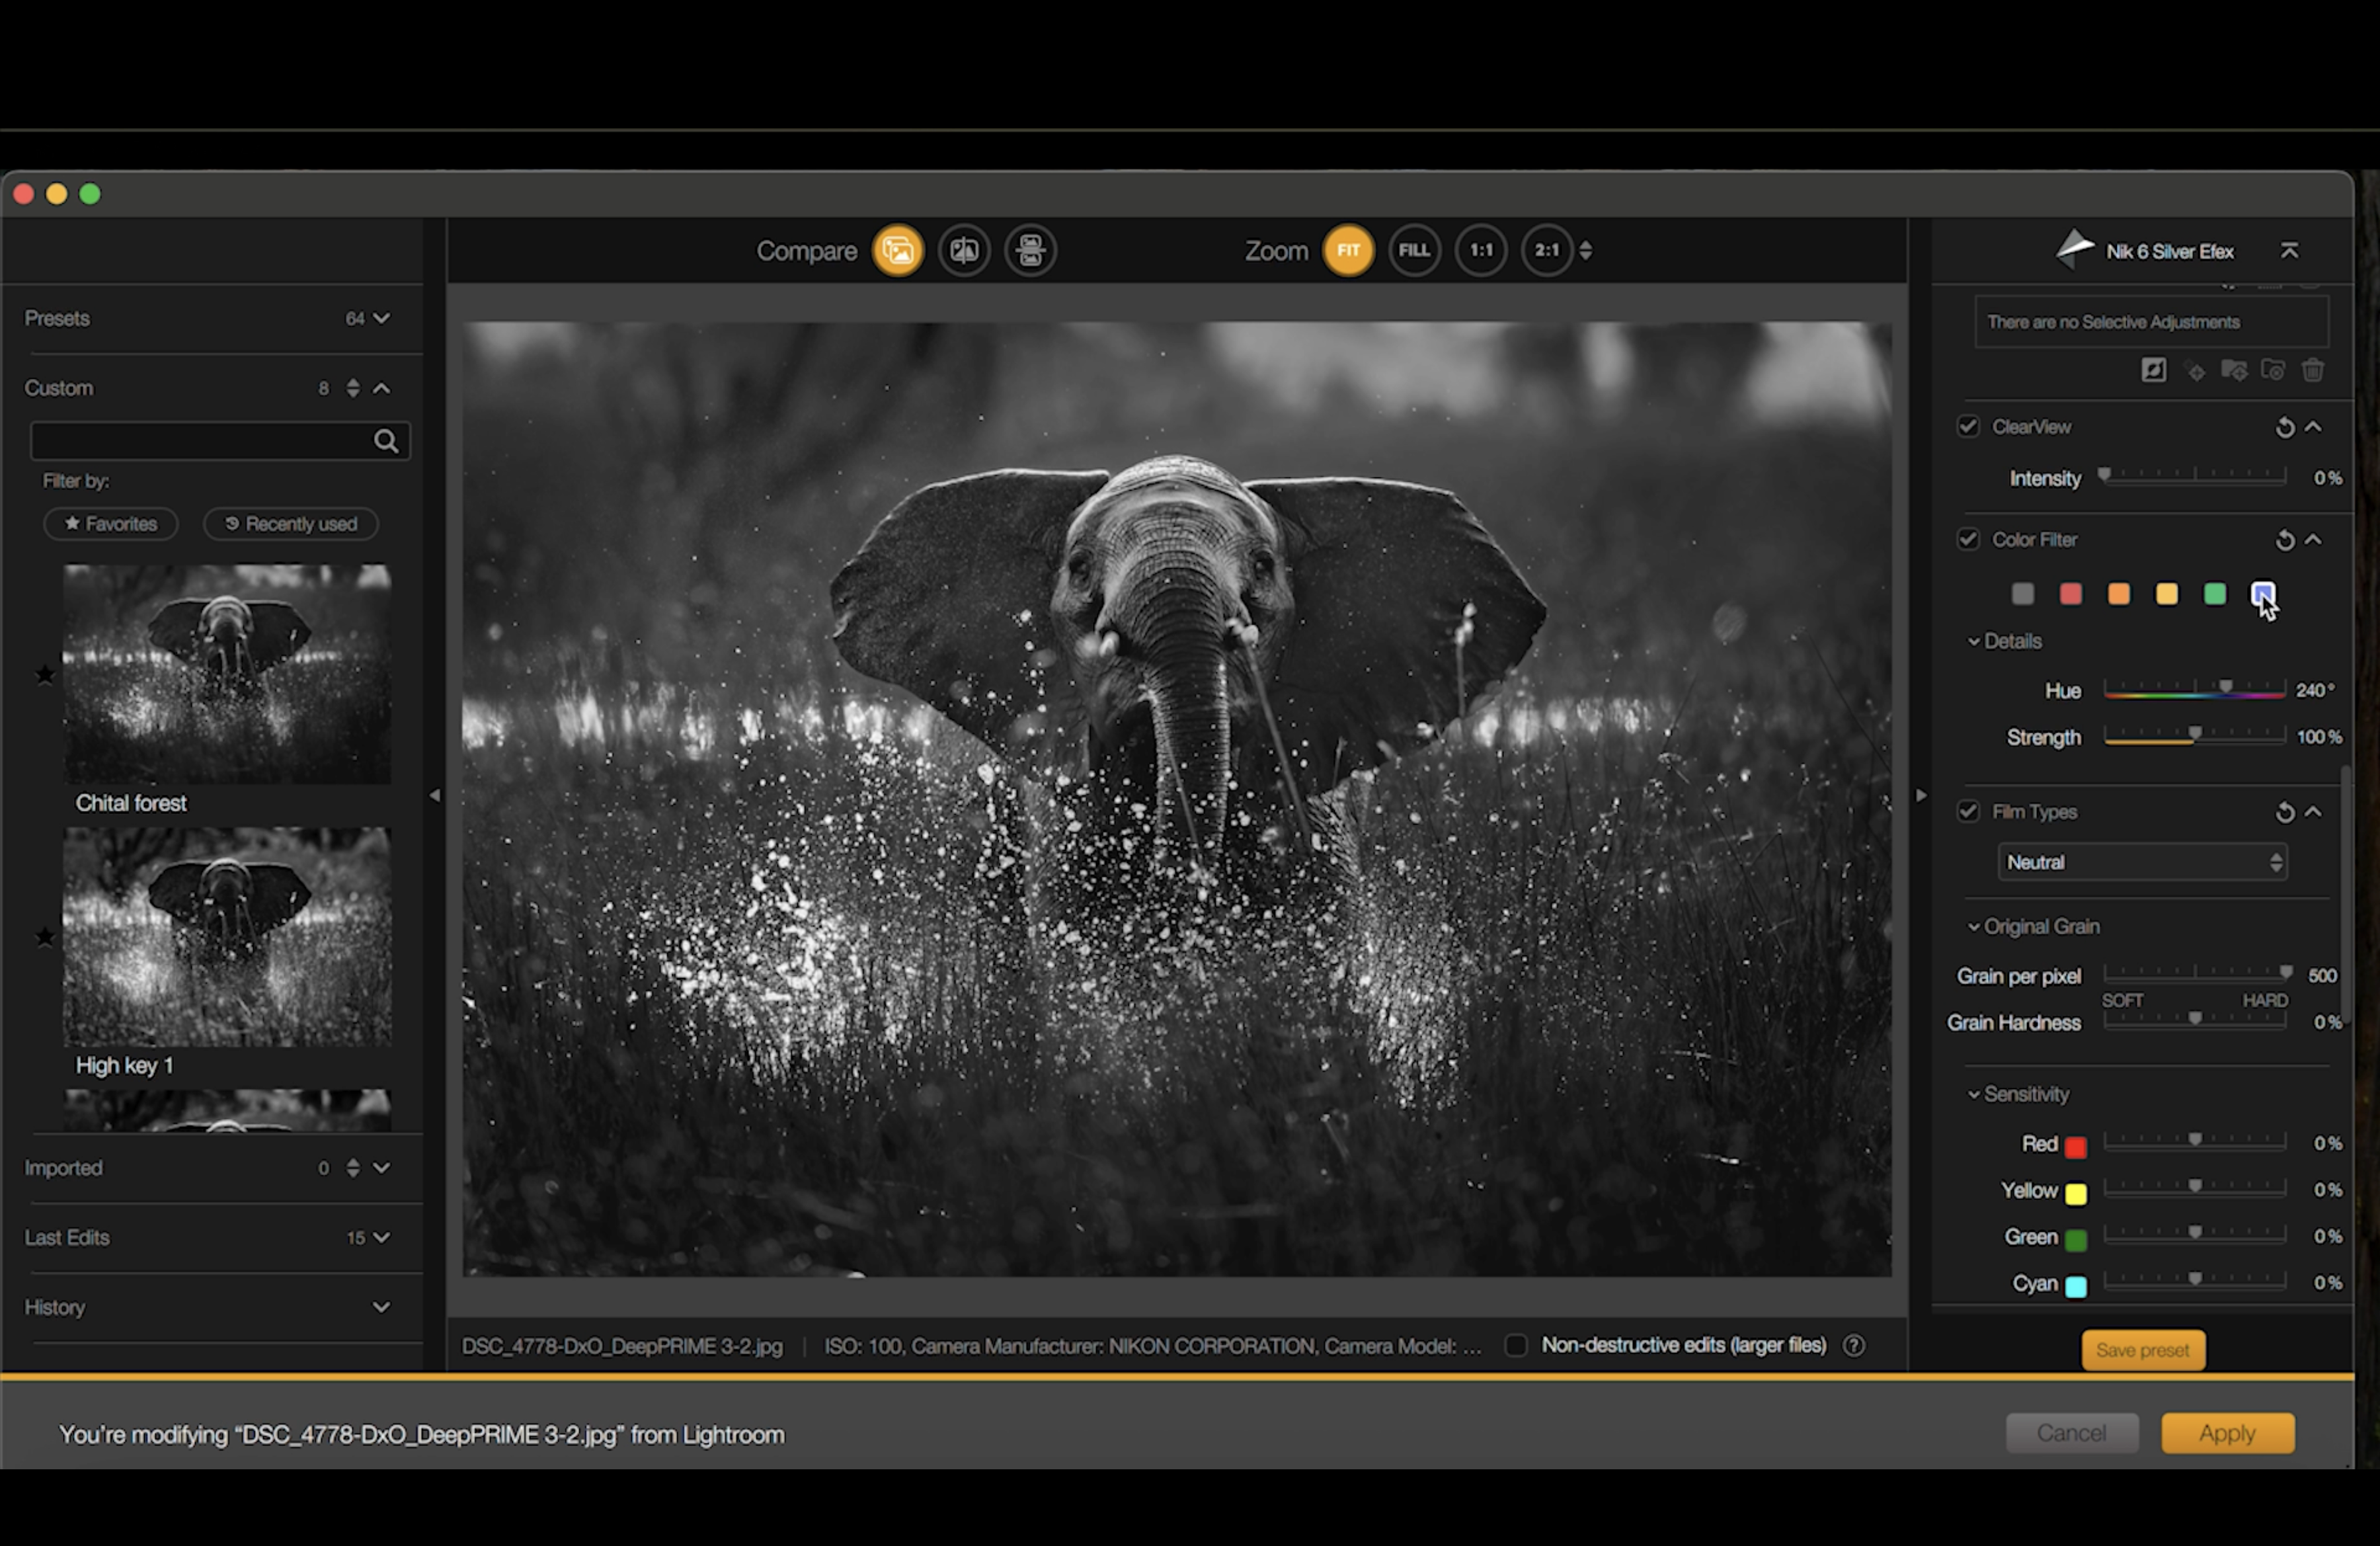
3. Use the Colour Filter First (Film Look Without Film)
In the film days, photographers used physical colour filters to control how colours translated into tones of grey. Silver Efex Pro brings this back with its Colour Filter tool.
3.1 Choose a Filter That Gives the Right Base Tonality
In Silver Efex Pro:
- Go to Colour Filter
- Click through the filter options and watch how different colours shift into lighter or darker greys
In Darren’s elephant example, some filters made the reeds and background too dark, so he chose a more balanced option.
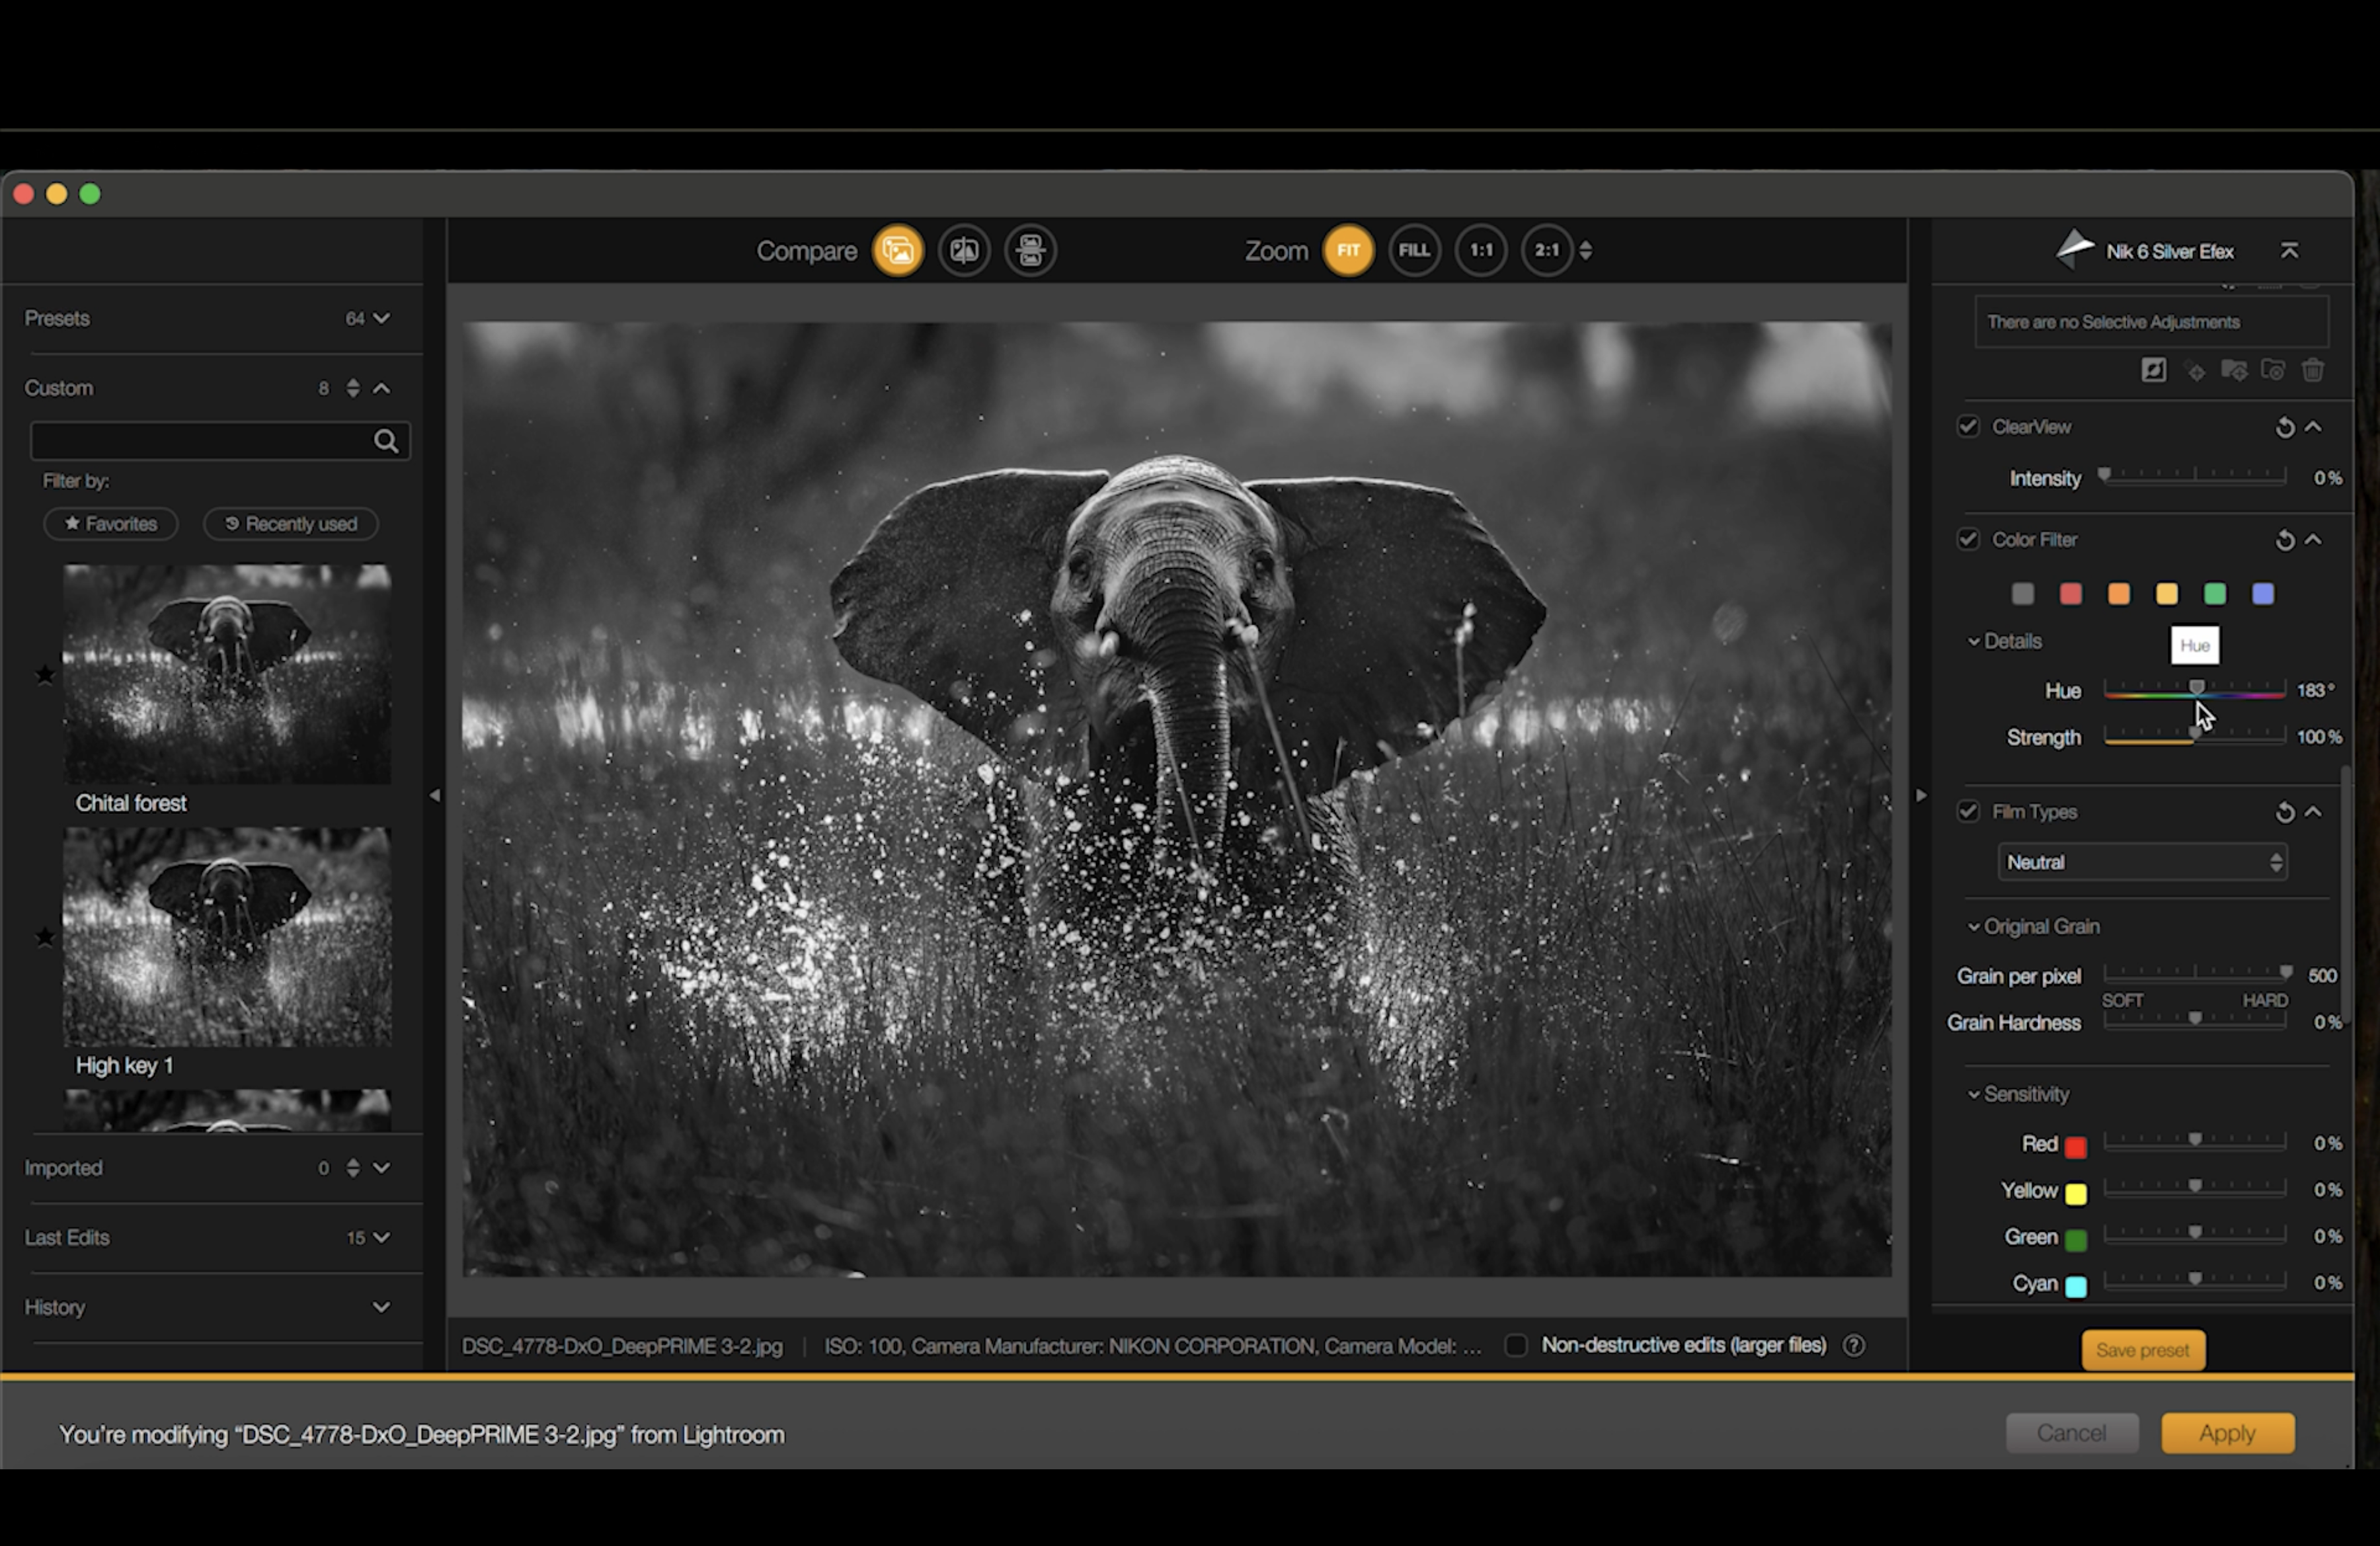
3.2 Fine-Tune With Hue and Strength
Controls:
- Hue: shifts which colour range is being emphasised
- Strength: controls how strong the filter effect is
Recommended approach:
- Adjust hue until the subject and background separate cleanly
- Keep strength moderate so it does not feel heavy-handed
Why this matters: This step sets the overall “translation” of colour-to-grey, which affects everything you do after.
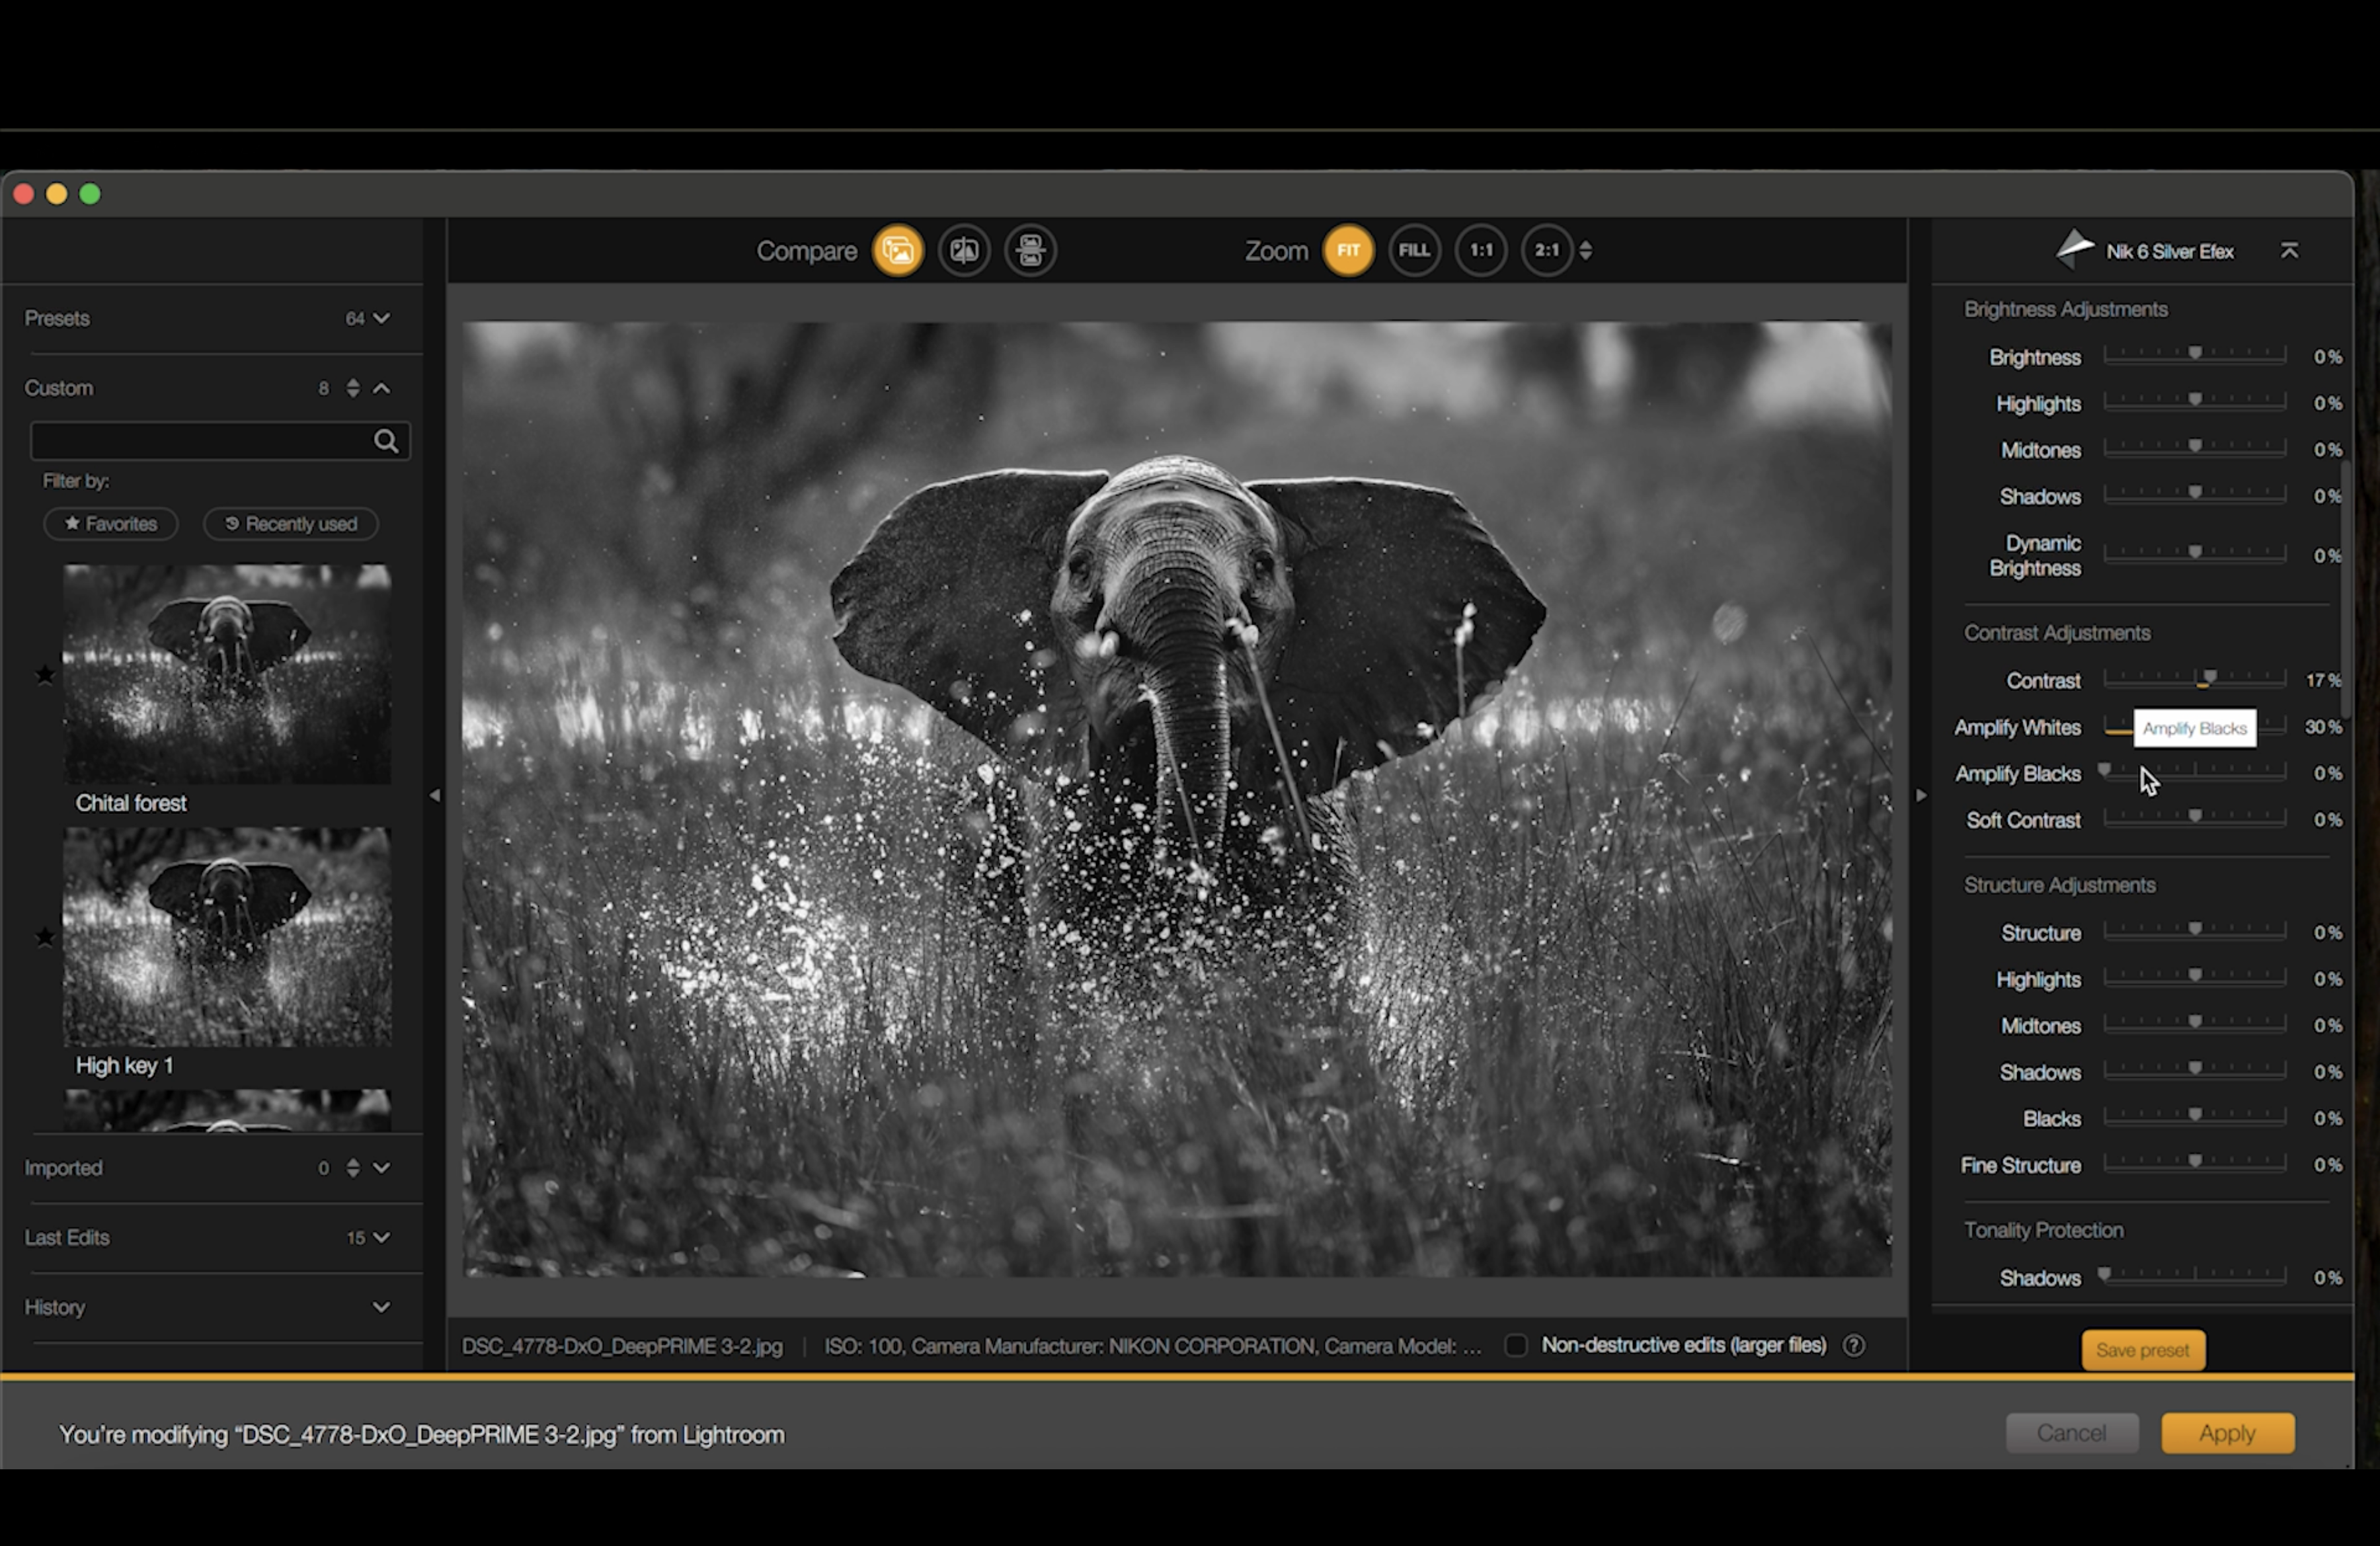
4. Build Contrast Carefully (Protect Shadow Detail)
Contrast gives black and white its impact, but it can also destroy detail quickly, especially in wildlife subjects with large shadow areas.
4.1 Set Your Main Contrast
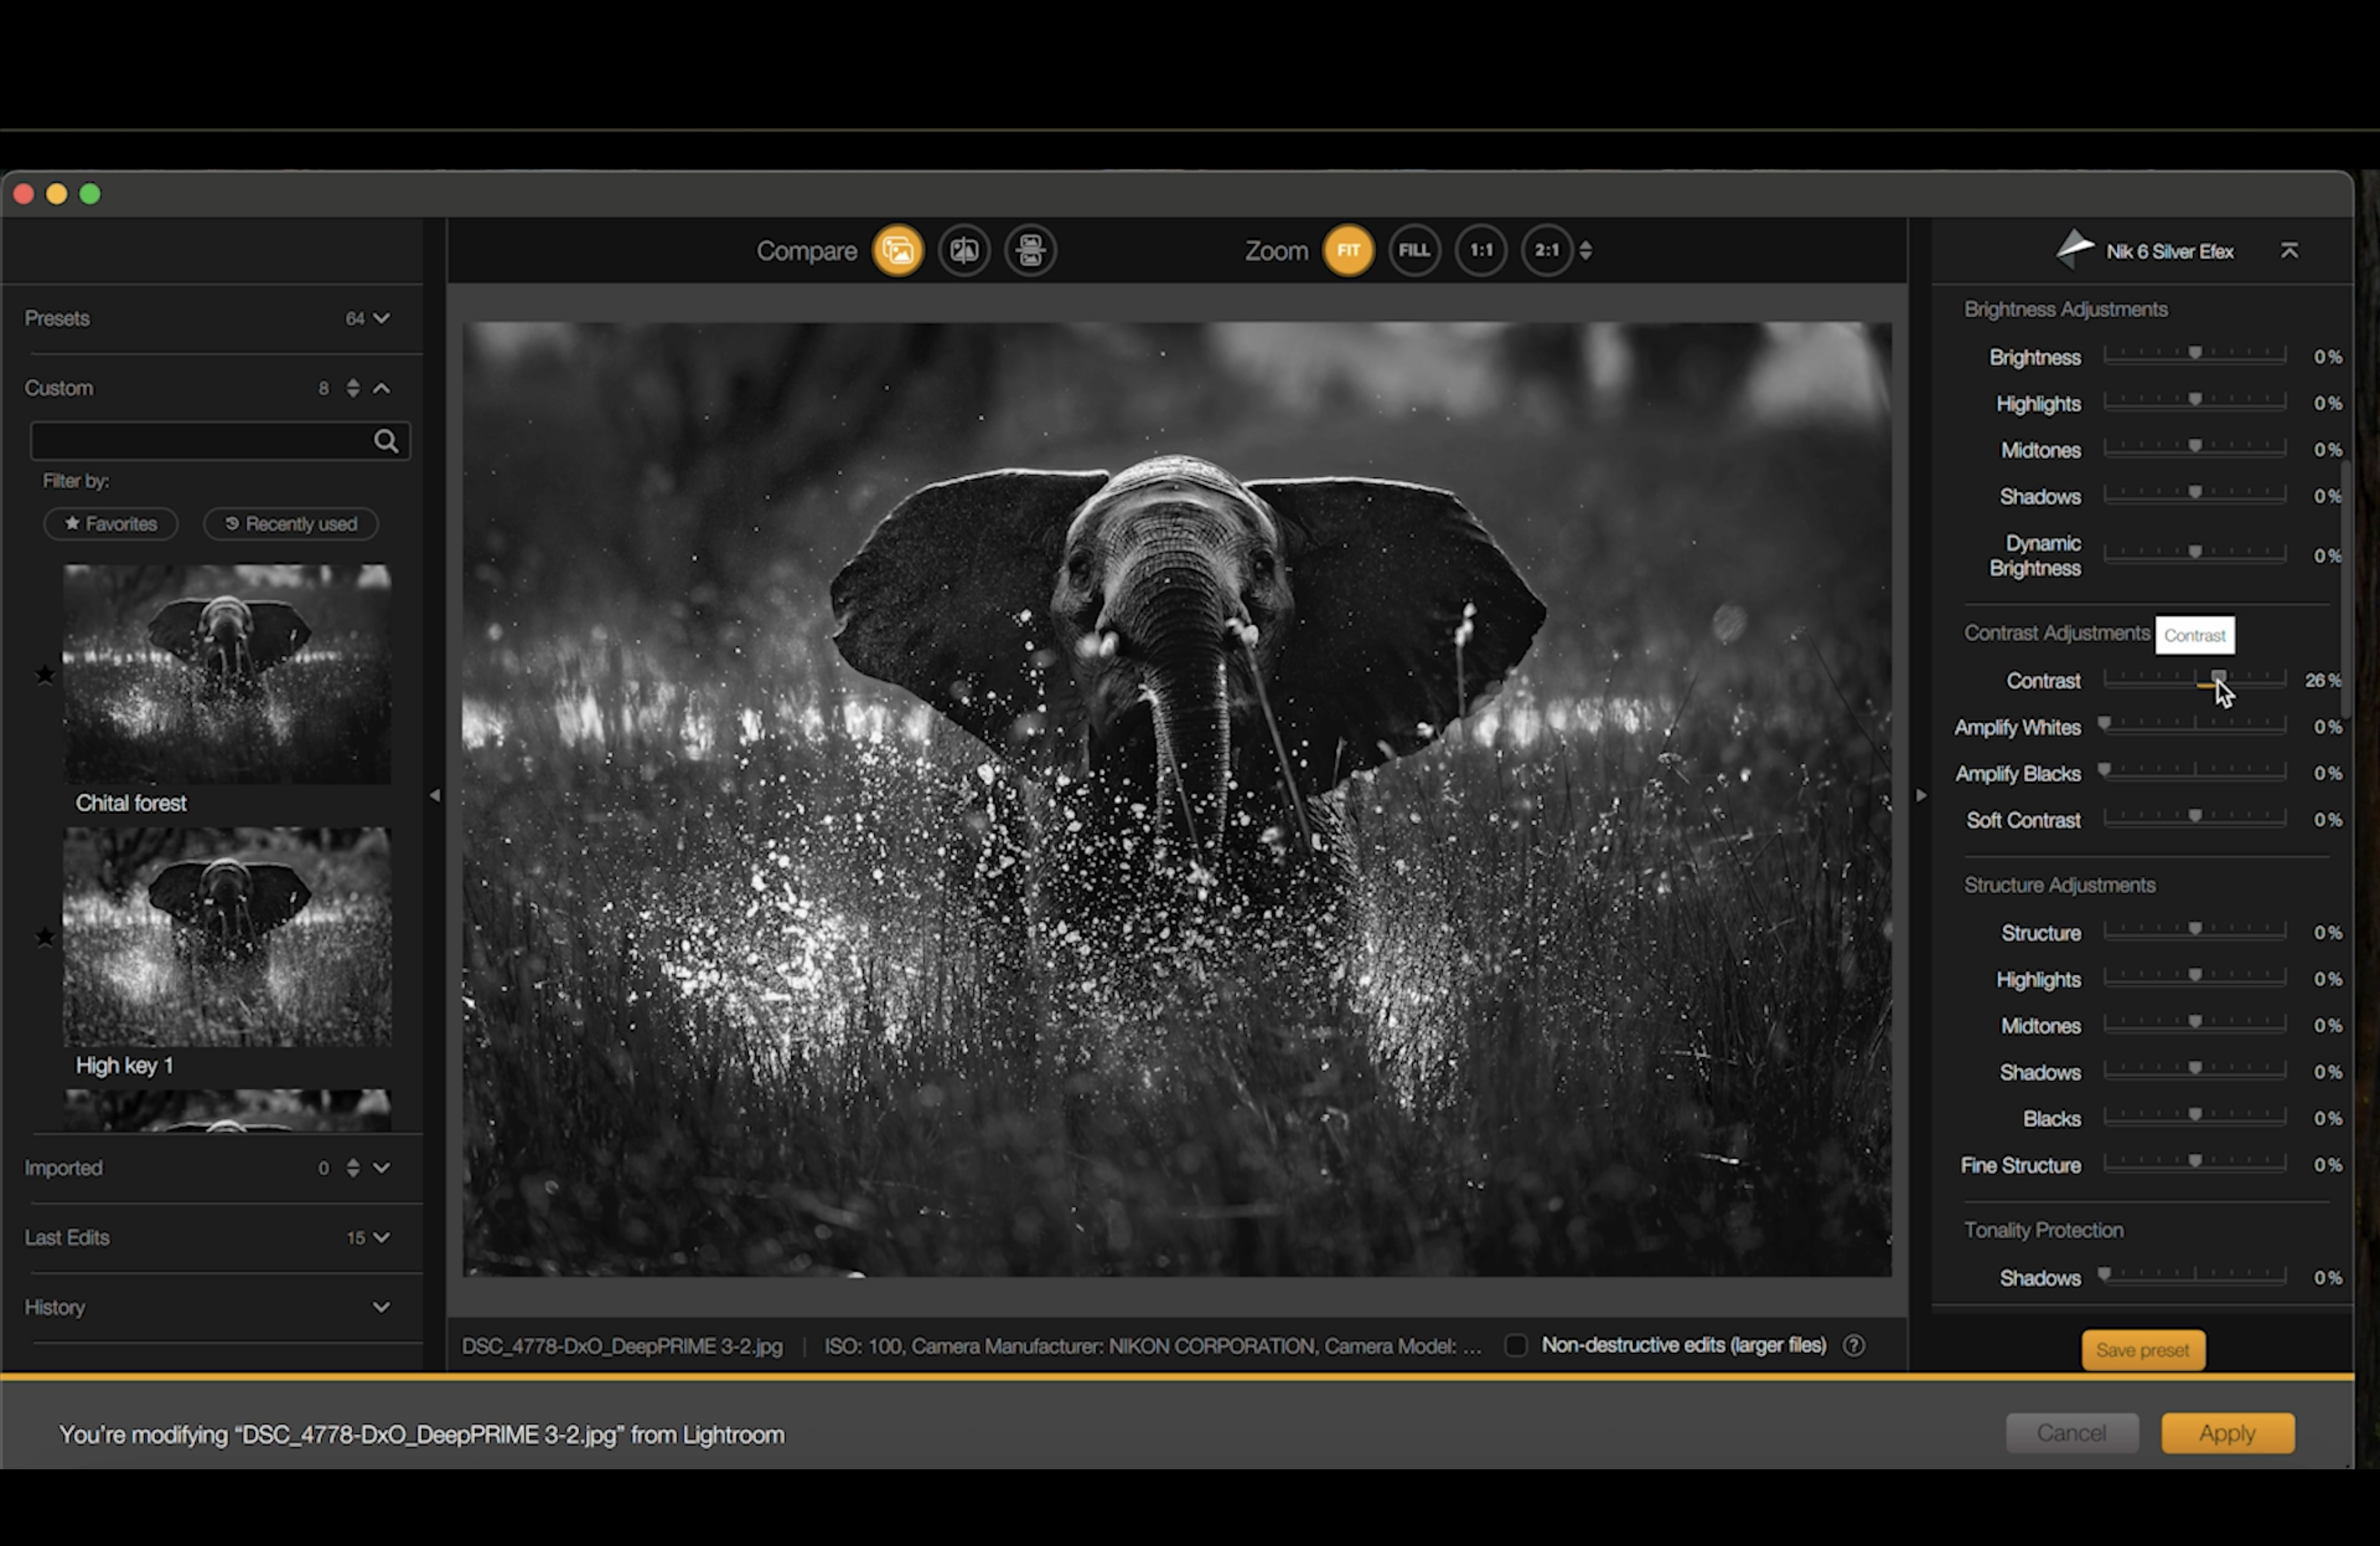
Control: Contrast
This is a classic contrast adjustment: darks get darker, lights get lighter.
Field note: Be careful with deep shadows like elephant ears. If you push too far, the shadows block up and texture disappears.
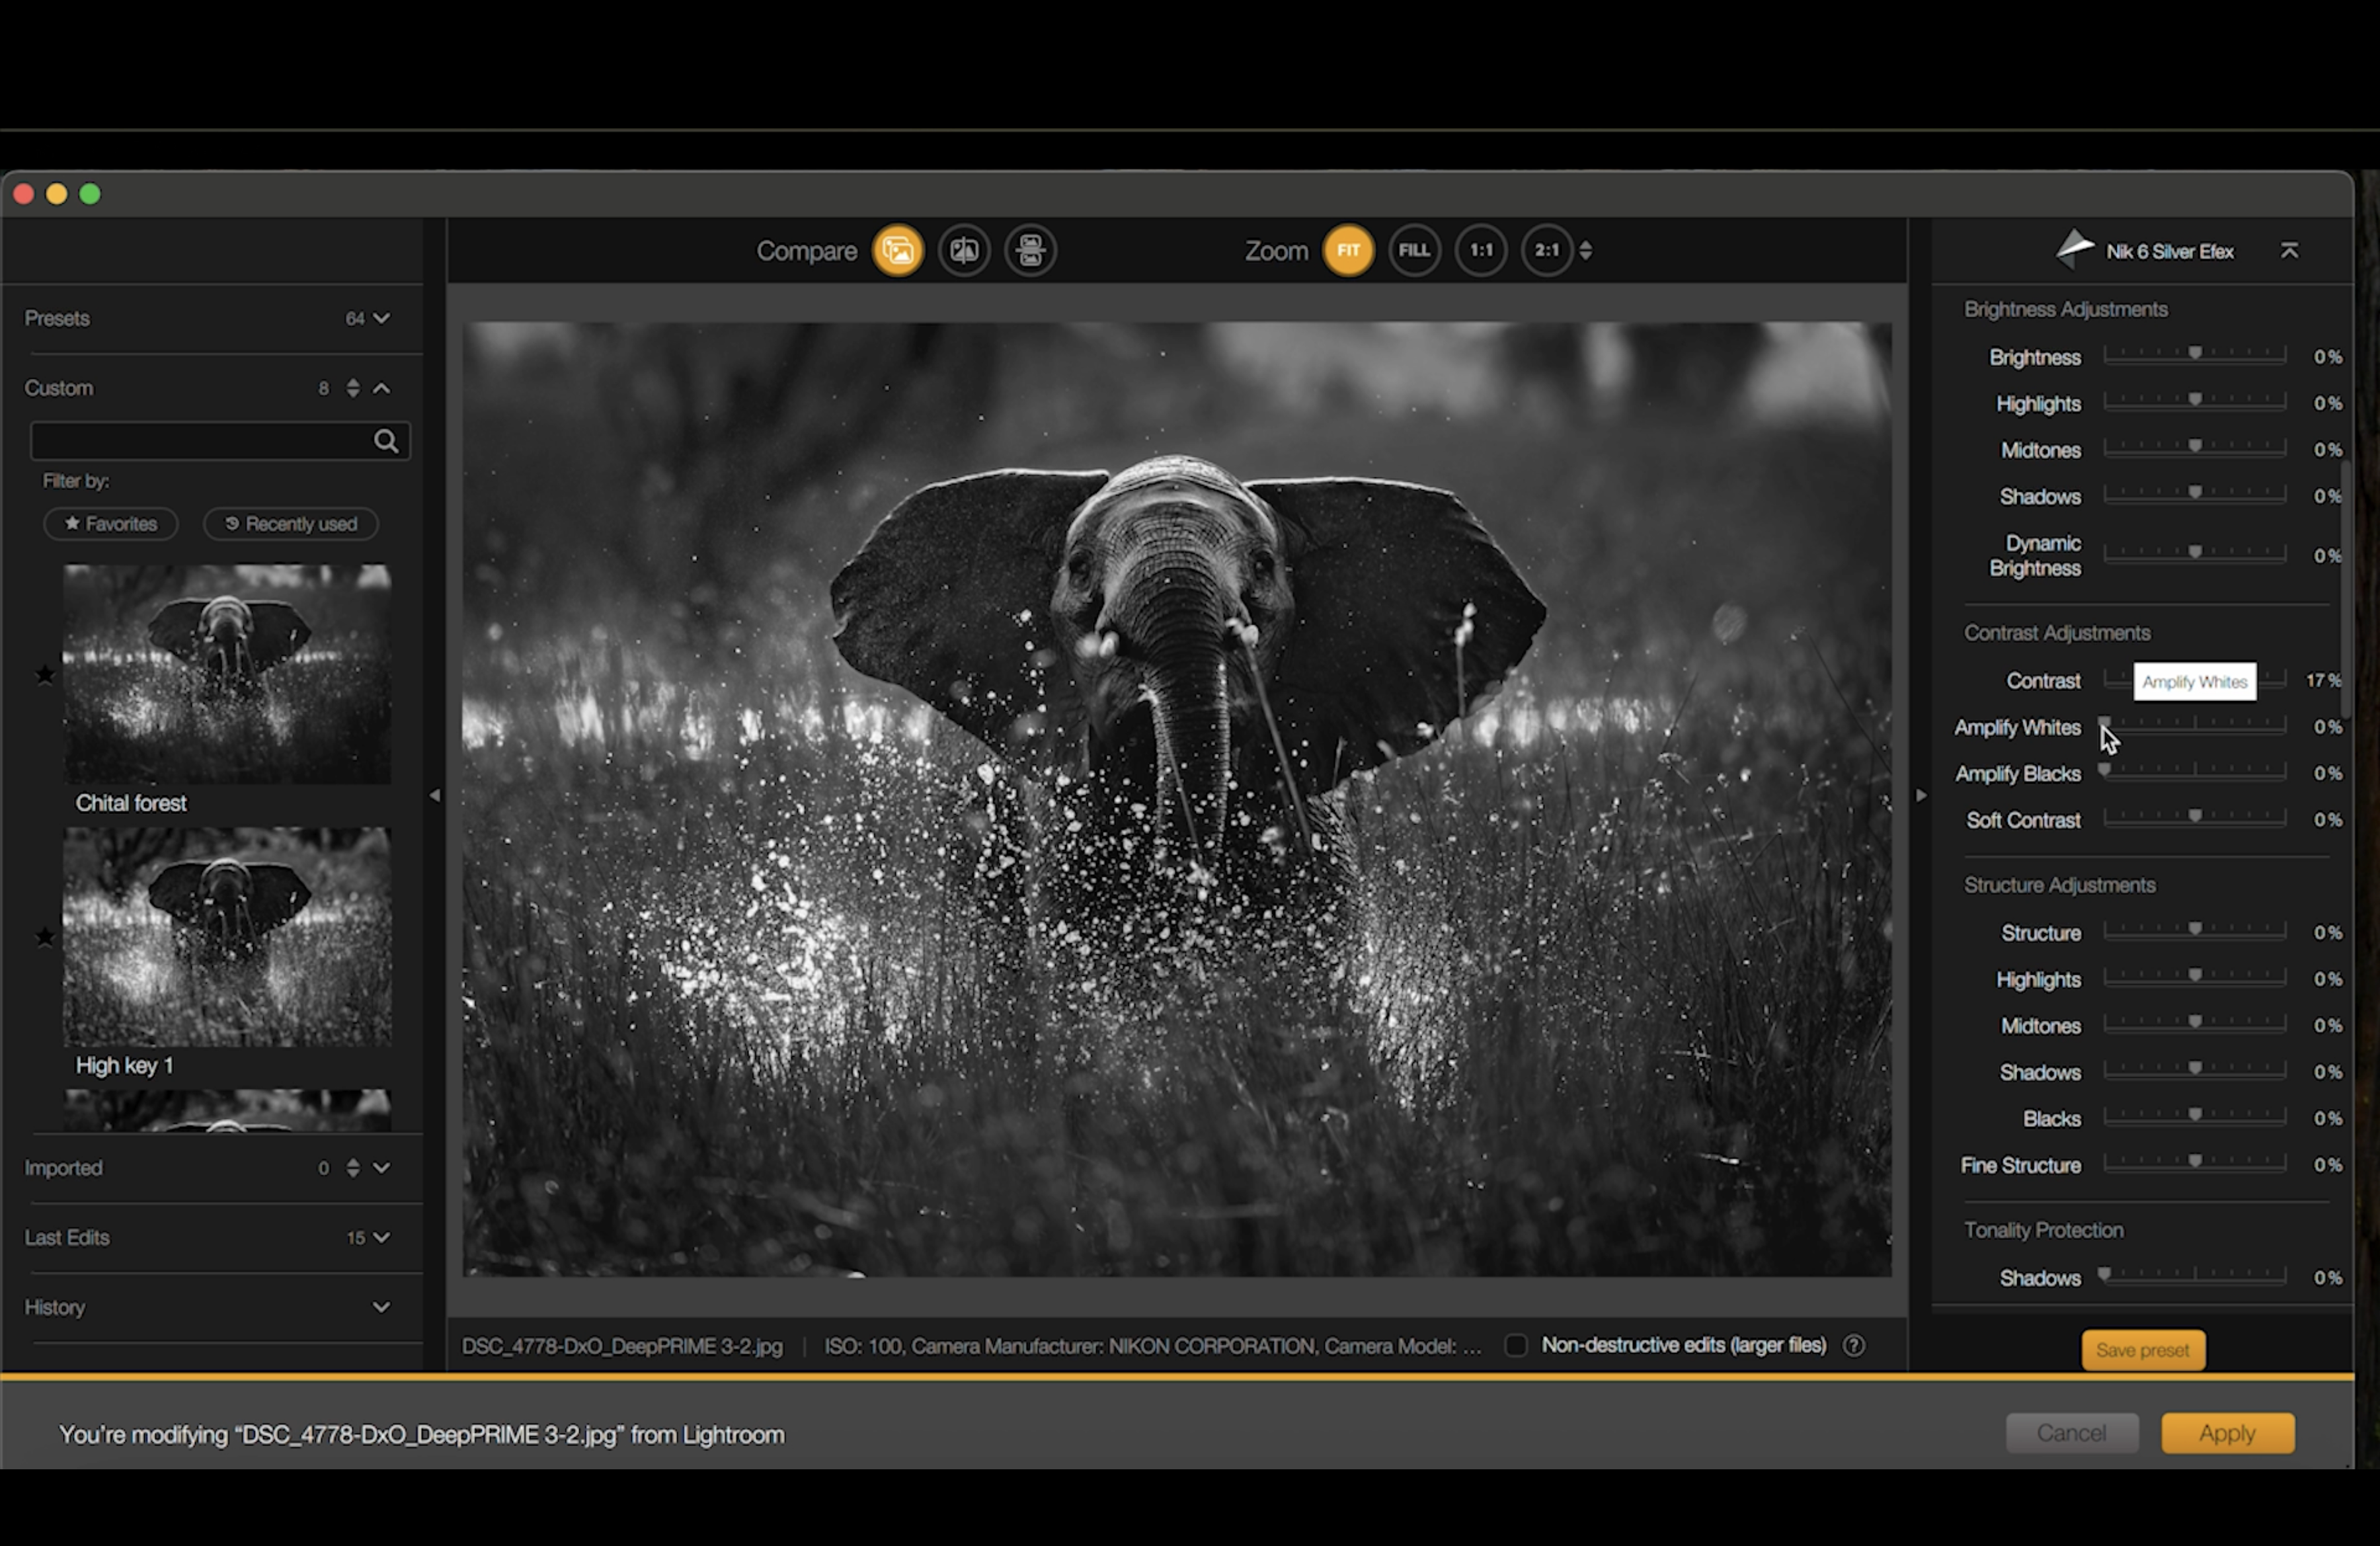
4.2 Make Highlights Pop With Amplify Whites
Control: Amplify Whites
Darren describes this as a smart brightness control for highlights.
Best use:
- Water spray
- Rim light
- Bright edges on the face or trunk
- Backlit dust or mist
It aims to lift highlights without aggressively clipping.
4.3 Deepen Tones With Amplify Blacks
Control: Amplify Blacks
This enriches dark areas while trying to preserve detail.
Best use:
- Grounding the subject
- Adding depth under the trunk or body
- Strengthening shape without crushing the file
5. Add Soft Contrast for Smooth Darkroom-Style Transitions
Control: Soft Contrast
This is one of the key Silver Efex tools Darren leans on. It helps avoid harsh edges and gives smoother tonal transitions, closer to a traditional darkroom feel.
Recommended approach:
- Use conservatively
- If it starts to look “over-processed”, back it off
6. Use Dynamic Brightness Without Undoing Your Contrast
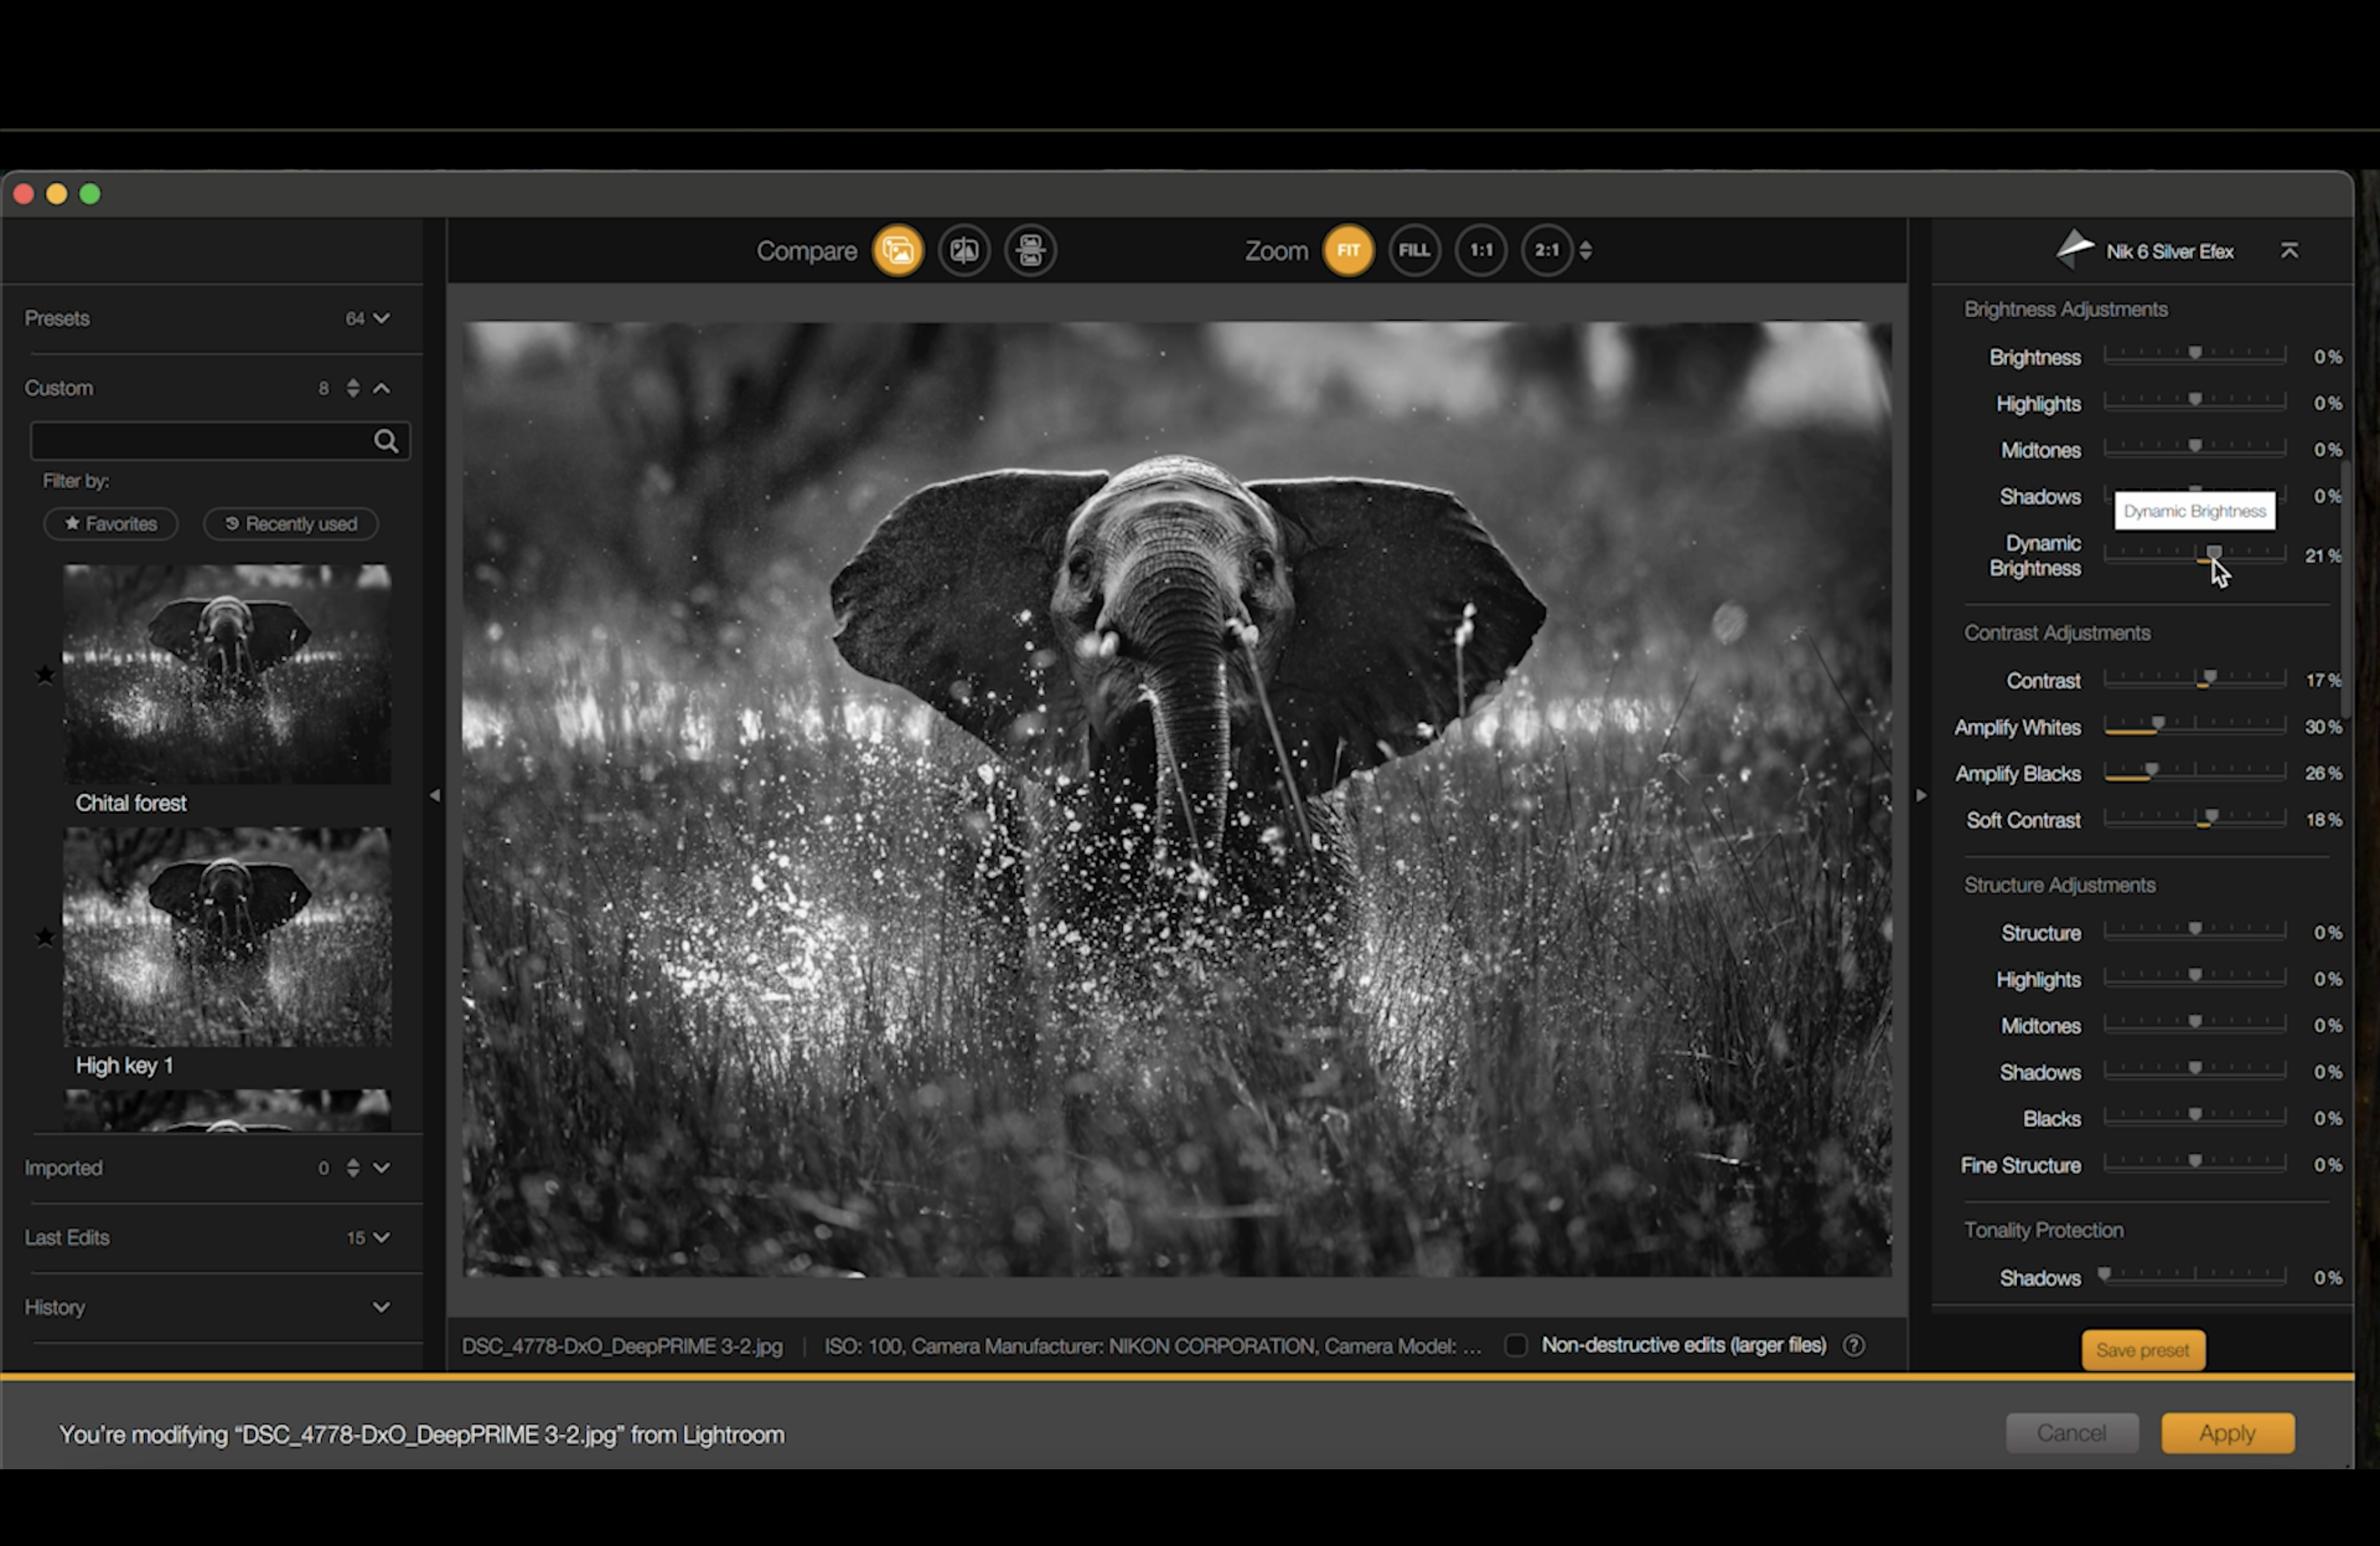
Control: Dynamic Brightness
This adjusts overall brightness without changing the contrast decisions you have already made.
When to use it:
- When the image needs a slight lift after contrast is set
- When you want more readability without flattening the tones
7. Check Tonal Range With the Ansel Adams Zone System Trick
This is a practical tool inside Silver Efex that helps you confirm you have a strong spread of tones across the image.
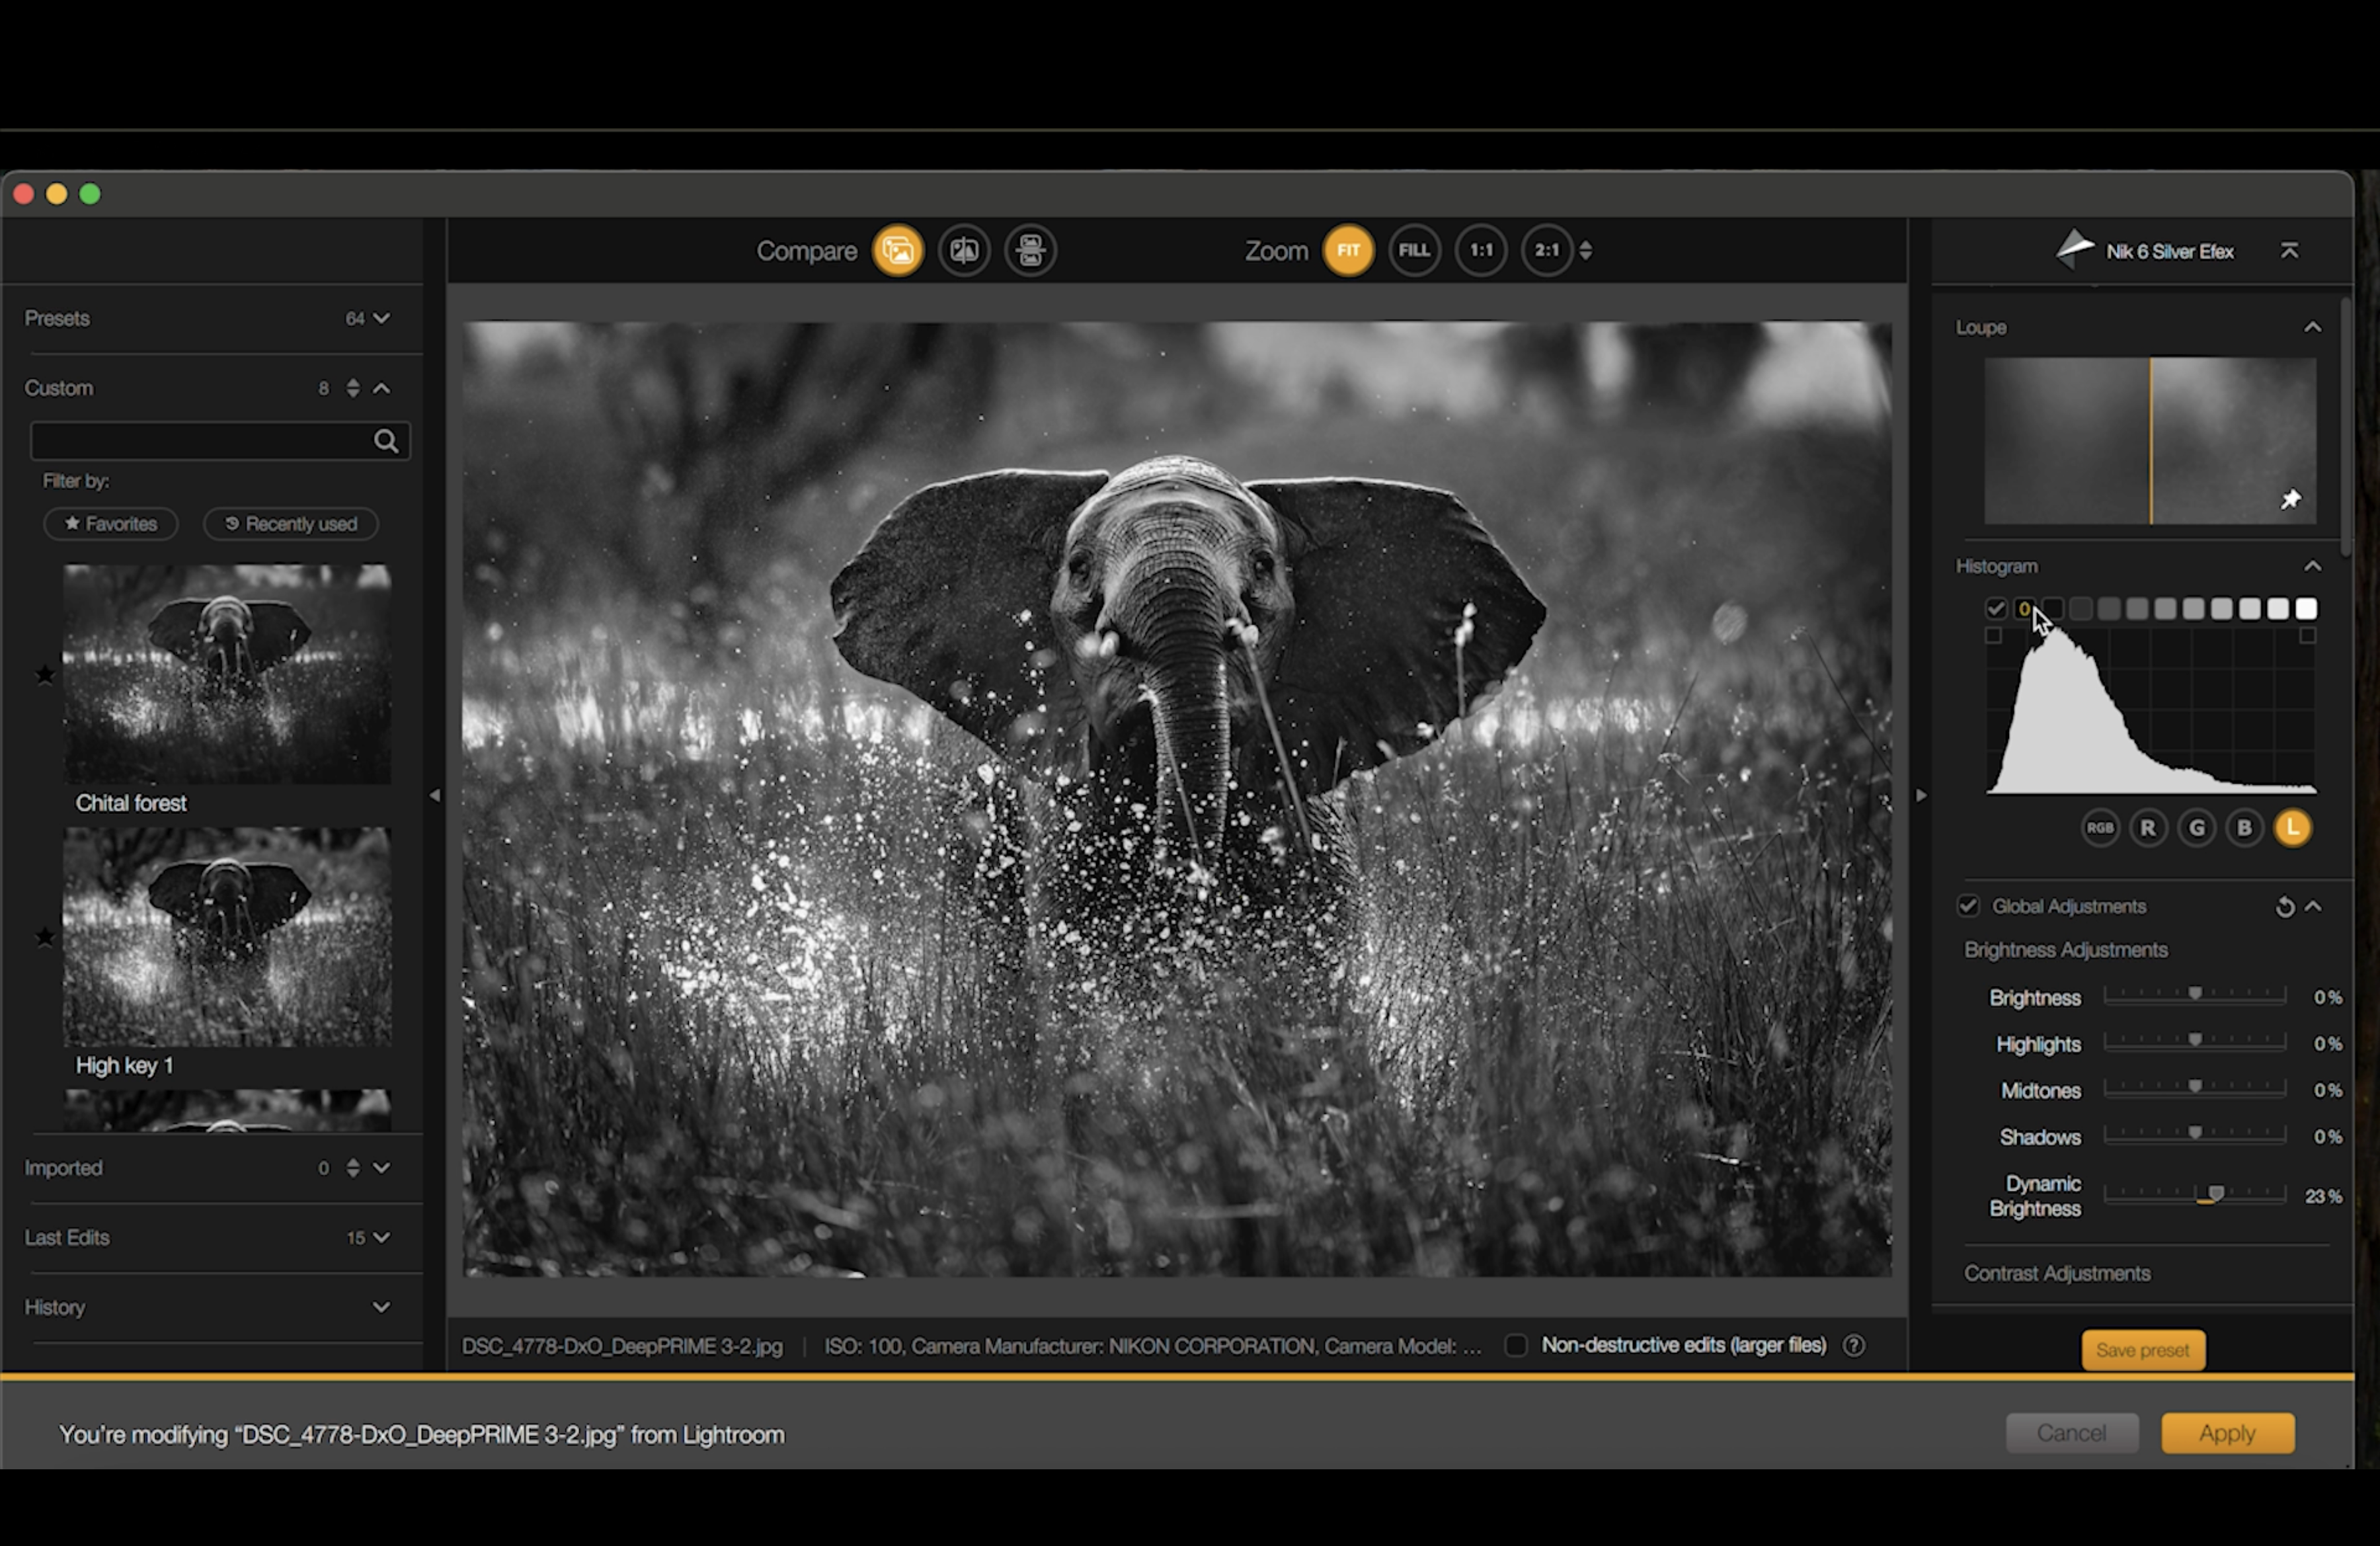
7.1 Use the Histogram Zones
In the histogram, hover across the tonal zones (dark to light). Silver Efex highlights the corresponding parts of the image.
What you want:
At least some portion of your image represented across the tonal range, from deep blacks through mid-tones to near whites.
7.2 Adjust Contrast and Brightness to Fill the Range
If you are missing true blacks or near whites:
- Return to Contrast, Amplify Whites, Amplify Blacks, and Dynamic Brightness
- Adjust subtly
- Re-check the histogram zones
Why this matters: A strong black and white image usually feels “complete” tonally. This is a fast way to confirm you have that richness without guessing.
8. Add Structure Like You Would Add Salt (Carefully)
Structure controls micro-contrast and texture. It can make a wildlife image feel tactile, but it can also create harshness quickly.
8.1 Global Structure
Control: Structure
This affects micro edges and texture across the frame.
Recommended approach: Small increase only.
8.2 Structure by Tonal Range
Silver Efex lets you target structure into different tonal zones:
- Highlights: Great for water droplets and bright texture
- Mid-tones: Very powerful because most pixels sit here, so be conservative
- Shadows/Blacks: Adds bite, but watch noise and harshness
8.3 Fine Structure
Control: Fine Structure
This affects finer details like hairs and small grasses.
In Darren’s elephant example, he keeps this conservative and even uses a slight negative adjustment to keep the background grasses softer, while the water detail remains crisp from the highlight structure work.

9. A Useful Creative Option: Negative Structure for a Misty Look
If you have a busy background or small distracting elements, pushing structure into the negative can create a softer, dreamier background effect.
When it works well:
- High-key scenes
- Bright backgrounds with dark subjects
- Situations where you want clutter to fall away without looking artificially blurred

Final Notes on Building Strong Safari Black and White
The power of black and white on safari is usually already in the scene: backlight, spray, dust, texture, gesture. Silver Efex Pro helps you reveal that, but the results come from small, deliberate decisions rather than big slider moves.
Start with the colour filter, build contrast in layers, check your tonal spread using the histogram zones, then finish with structure only where it adds to the story. The goal is not drama for its own sake, but clarity and depth.
Happy photographing!